Table of Contents
Halloween, the season of spookiness and creativity, provides the perfect opportunity for DIY enthusiasts to unleash their imagination and craft unique gifts that send shivers down the spine. While store-bought decorations and treats are readily available, there’s something special about receiving a handmade gift that embodies the spirit of the holiday. In this article, we’ll explore a range of creepy crafts that make ideal Halloween gifts for those who love to roll up their sleeves and get crafty.
Halloween, the season of spookiness and creativity, provides the perfect opportunity for DIY enthusiasts to unleash their imagination and craft unique gifts that send shivers down the spine. While store-bought decorations and treats are readily available, there’s something special about receiving a handmade gift that embodies the spirit of the holiday. In this article, we’ll explore a range of creepy crafts that make ideal Halloween gifts for those who love to roll up their sleeves and get crafty.
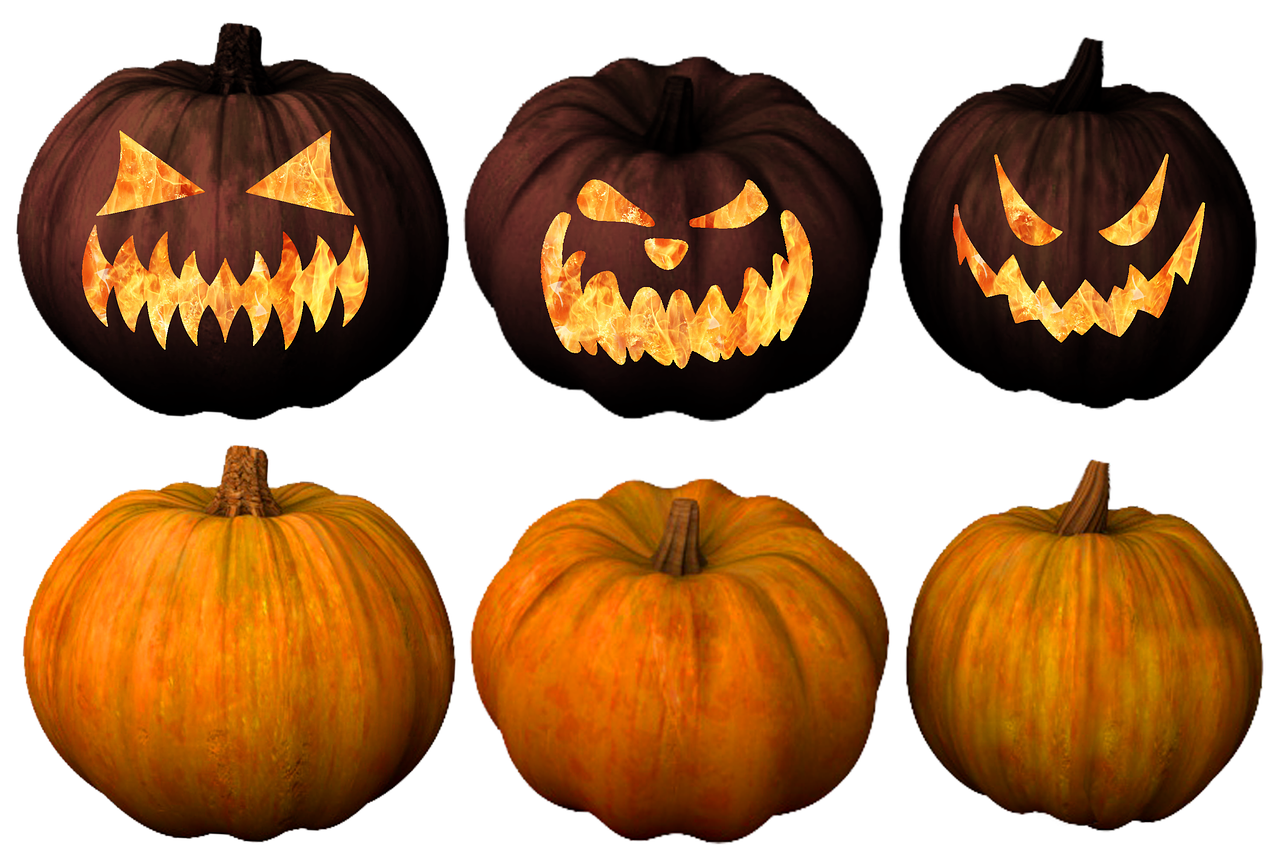
Personalized Pumpkin Carvings: Create one-of-a-kind pumpkin carvings featuring the recipient’s name or a spooky design of their choice. These personalized pumpkins not only make fantastic gifts but also add a unique touch to Halloween decor.
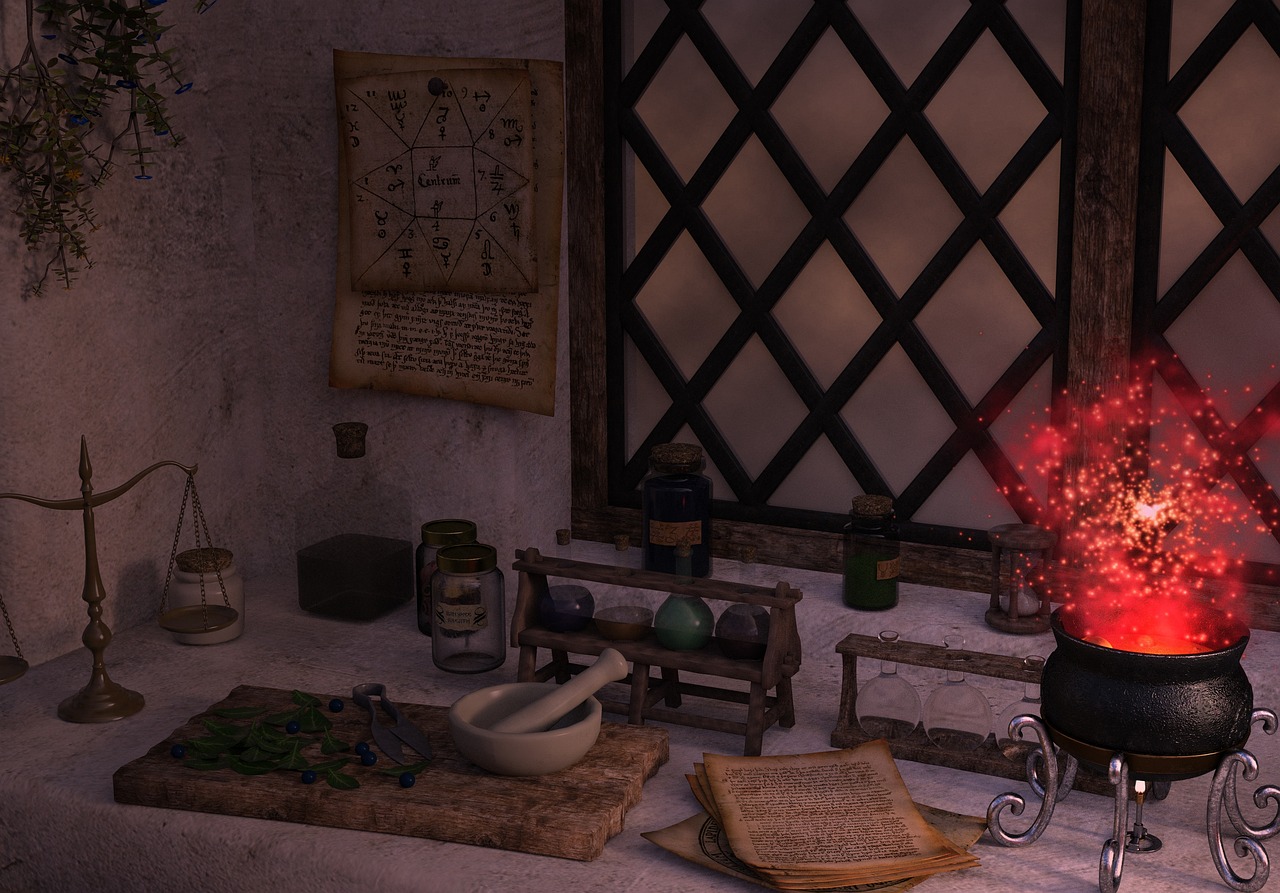
Witchy Potions and Elixirs: Craft mysterious bottles filled with colored liquids, glitter and labels that mimic ancient potion bottles. These bewitching creations can serve as both decor and conversation starters.
Haunted House Miniatures: Build miniature haunted houses complete with eerie details like ghostly figures, tiny tombstones and flickering LED candles. These intricate dioramas make for fascinating and atmospheric gifts.
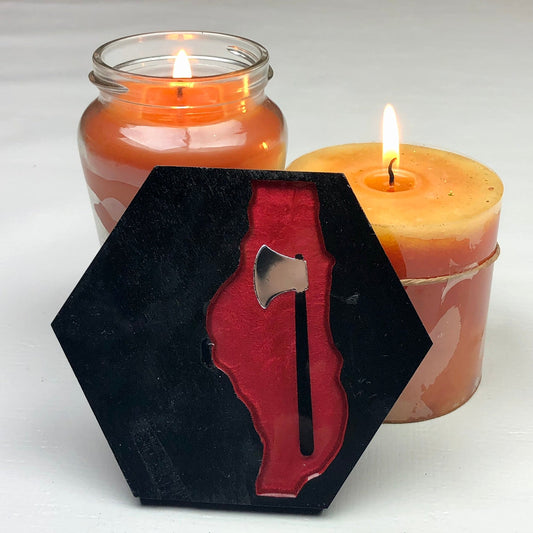
Candles with a Twist: Customize candles with eerie wax drips and spooky silhouettes. You can even embed small surprises like plastic spiders or skeletal hands that emerge as the candle burns.
Ghoulish Gourmet Treats: Prepare a selection of homemade Halloween treats, such as spooky-shaped cookies, caramel apples with eerie toppings or candy-filled “poison” apples. Package them creatively for a delectable gift.
Creepy Cloth Decor: Hand-stitch or distress pieces of cloth to create creepy and tattered tablecloths, curtains or banners. These pieces can instantly transform any space into a haunted hideaway.
DIY Witch’s Broom: Craft your own witch’s broom using twigs, branches and natural materials. Decorate it with ribbons, feathers and charms for a unique and magical gift.
Spooky Storybooks: Write and illustrate your own spooky short stories or create personalized Halloween-themed storybooks for friends and family. Add a touch of mystery with hidden messages or illustrations.
Coffin Jewelry Boxes: Design and construct miniature coffin-shaped jewelry boxes. These macabre yet elegant containers are perfect for storing Halloween accessories or cherished trinkets.
Custom Tombstone Decor: Carve and paint custom tombstone decorations featuring humorous or meaningful epitaphs. These can be placed in gardens or displayed indoors for a touch of graveyard whimsy.
Haunted Terrariums: Assemble small terrariums with miniature skeletons, tombstones and spooky plants like carnivorous Venus flytraps. These miniature landscapes bring a touch of the eerie to any space.
DIY Ouija Boards: Create personalized Ouija boards with unique designs and themes. Pair them with a handcrafted planchette for a spooky gift that can add mystique to any gathering.
These DIY Halloween gifts not only showcase your creativity but also demonstrate your thoughtfulness in crafting something special for your loved ones. Whether you’re aiming for whimsical or spine-chilling, these handmade creations capture the essence of Halloween and offer a truly memorable way to celebrate the season with those who appreciate the art of crafting.
Explore this link for a more extensive examination of the topic: Introducing #MakeHalloween365 – The Craft Project Hashtag for …
Macabre Mason Jar Lanterns
Transform ordinary mason jars into eerie lanterns that cast an enchanting glow. Start by painting the jars with black or deep, moody colors. Then, cut out spooky silhouettes like bats, witches or haunted houses from black paper. Glue these shapes onto the jars and once they dry, place a battery-operated tea light inside. These macabre lanterns create a hauntingly beautiful atmosphere and make for a thoughtful and practical gift.
Turning ordinary mason jars into eerie lanterns is a fantastic DIY project that not only allows you to embrace your creative side but also brings a touch of enchantment to your Halloween decor. Here’s how you can extend this idea:
Choose Your Mason Jars: Start by selecting mason jars of various sizes and shapes. This variety will add depth and dimension to your display. You can use both clear and frosted jars, depending on the effect you want to achieve.
Paint for Ambiance: Paint the exterior of your mason jars with black or deep, moody colors. Matte finishes work particularly well to create a mysterious and gothic look. You can also experiment with dark purples, blues or greens to add a unique twist to your lanterns.
Spooky Silhouettes: Now, it’s time to get creative with spooky silhouettes. Cut out your chosen shapes like bats, witches on broomsticks or haunted houses from black paper. You can find templates online or sketch your own for a personal touch. Ensure the shapes are sized to fit nicely on the jars.
Glue the Silhouettes: Using a strong craft glue, carefully adhere the black paper silhouettes onto the painted jars. Be patient and precise to ensure they stick well and create a striking contrast against the dark background.
Light the Way: Once the glue has dried, place battery-operated tea lights inside the jars. These LED lights provide a safe and flickering candle-like glow that enhances the eerie atmosphere. You can also use colored LED lights for an added spooky effect, such as an eerie green or blood-red glow.
Personalize and Share: Consider personalizing some of the lanterns with initials, names or spooky phrases to make them even more unique. These lanterns also make for wonderful gifts. Share the magic of DIY Halloween decor by giving them to friends and family. They’re not only visually appealing but also practical for creating a hauntingly beautiful atmosphere at home.
These macabre lanterns serve as an artistic expression of your Halloween spirit and provide a versatile decoration that can be used indoors or outdoors. Whether you place them on a mantel, line your walkway or use them as a spooky centerpiece for a Halloween party, these lanterns are sure to captivate and delight anyone who encounters them.
Don’t stop here; you can continue your exploration by following this link for more details: 36 Halloween Mason Jars – Halloween Craft Ideas Using Mason Jars
Creepy Crawly Candle Holders
Take plain glass candle holders and give them a spooky makeover. Using hot glue, create creepy-crawly spider webs, complete with spiders, on the outside of the holders. Once the glue cools and hardens, spray-paint the entire holder in a dark and sinister color like matte black or deep purple. Place a candle inside and when lit, the flickering flame will cast eerie shadows through the spider webs.
Elevate your Halloween decor by embarking on a creative transformation of plain glass candle holders. With a touch of ingenuity and a dash of spookiness, you can craft a unique and captivating centerpiece. Here’s how to bring this enchanting project to life:
1. Plain to Spine-Chilling: Begin with ordinary glass candle holders, available at most craft stores. Their simplicity is the perfect canvas for your Halloween masterpiece.
2. Spider Web Artistry: Using a hot glue gun, carefully weave intricate spider webs across the surface of the glass candle holder. Allow your creativity to flow as you craft each delicate strand, complete with the suggestion of lurking spiders. The process is both therapeutic and spooky, setting the stage for a truly one-of-a-kind creation.
3. Set the Mood with Color: Once the glue has cooled and hardened, it’s time to infuse a dose of dark allure. Spray-paint the entire candle holder in a sinister color like matte black or deep purple. This transformation adds a layer of mystique and sets the stage for the eerie ambiance you’re seeking.
4. Candlelight Enchantment: Place your favorite candle inside the holder. When lit, the flickering flame will cast a haunting glow through the intricate spider webs. The play of light and shadows creates an entrancing spectacle that captivates and intrigues.
5. Arrange with Purpose: Arrange these bewitched candle holders strategically throughout your Halloween decor. They can serve as the centerpiece of your dining table, adorn your mantle or cast eerie light from various corners of your haunted space.
6. Customization Galore: Feel free to customize this project to fit your theme or preferences. Experiment with different colors, from rich reds to haunting greens, to create a unique, personalized collection of candle holders. You can also vary the size and intricacy of the spider web designs for added diversity.
7. Beware of Safety: As with all candles, exercise caution and ensure that the flames are attended at all times. Consider using battery-operated LED candles for added safety, especially if you have young trick-or-treaters in the house.
With this DIY project, you not only create a captivating Halloween decor piece but also indulge your artistic side. The delicate spider webs, painted in sinister hues, evoke a sense of mystery and enchantment. When the candles are lit, the dance of shadows and light adds an otherworldly dimension to your decor, inviting all who behold it into a realm of Halloween magic.
Looking for more insights? You’ll find them right here in our extended coverage: Halloween Crafts – Make this DIY Swarming Spiders Tablecloth

Ghastly Ghoulish Garland
Craft a ghoulish garland that’s perfect for decorating mantels, doorways or party spaces. Cut out ghost shapes from white felt or fabric and use fabric glue to attach googly eyes for a spooky touch. String these ghostly figures together with black or orange ribbon. This garland adds a playful yet eerie element to Halloween decor and makes a fantastic gift for fellow DIY enthusiasts.
“Unleash Your Creativity: Crafting a Charming and Spooky Ghost Garland
Adding a personal and handmade touch to your Halloween decor not only infuses your space with creativity but also offers a delightful opportunity for DIY enthusiasts to showcase their crafty skills. Craft a ghoulish garland that can adorn mantels, doorways or party spaces, creating an enchanting Halloween atmosphere. This charming project incorporates playful and eerie elements that are sure to captivate your guests and fellow DIY enthusiasts alike. Here’s how to bring this spooky ghost garland to life:
Materials You’ll Need:
- White felt or fabric
- Googly eyes in various sizes
- Fabric glue or a hot glue gun
- Black or orange ribbon
- Scissors
- Optional: black fabric paint or permanent marker for additional details
Steps to Create Your Ghost Garland:
1. Ghost Templates: Begin by creating templates for your ghost shapes. These can be as simple or as intricate as you like, depending on your crafting skills and desired aesthetic. You can draw the shapes freehand or find ghost templates online to print and cut out.
2. Cutting Ghost Shapes: Trace and cut out the ghost shapes from white felt or fabric. Make sure to cut two identical shapes for each ghost, as you’ll be gluing them together.
3. Adding Googly Eyes: With fabric glue or a hot glue gun, attach googly eyes to one side of each ghost. You can get creative with the eye placement, giving each ghost a unique and playful expression. Allow the glue to dry completely before moving on.
4. Joining the Ghosts: Once the eyes are securely attached, take two identical ghost shapes and place them back to back, with the eyes facing out. Glue the edges together, leaving the top open to create a pocket-like structure. This allows you to insert the ribbon later.
5. Stringing the Garland: Cut a length of black or orange ribbon to your desired garland length. Open the top of each ghost pocket and insert the ribbon. You can secure it in place with a small dot of fabric glue if needed. Leave some space between each ghost as you string them along the ribbon.
6. Additional Details: To enhance the eerie charm of your ghost garland, you can add additional details. Use black fabric paint or a permanent marker to draw mouths, eyebrows or other spooky features on the ghosts. These details can give each ghost its own personality and character.
7. Hanging Your Garland: Once your ghost garland is complete, it’s time to decide where to hang it. Mantels, doorways, staircases or even draped across a Halloween party table are excellent choices. Use adhesive hooks or clear tape to secure the garland in place without damaging your surfaces.
8. Share the Craft: This DIY ghost garland is not only a delightful addition to your Halloween decor but also a fantastic gift for fellow DIY enthusiasts. Share the joy of crafting by gifting your friends or family members with their very own ghoulish garland, encouraging them to unleash their creativity in the spirit of the season.
By crafting this charming and spooky ghost garland, you not only add a playful yet eerie element to your Halloween decor but also create a delightful and personalized piece of art that showcases your crafty talents. It’s a fun project that allows you to embrace the DIY spirit of Halloween and share the joy of creativity with others.”
Explore this link for a more extensive examination of the topic: 53 easy halloween paper crafts | Gathered
Sinister Spell Books
Create a collection of sinister spell books that could have come straight from a witch’s lair. Find old or thrifted hardcover books and paint them in dark, rich colors like burgundy, deep green or black. Add spooky titles and symbols to the covers using gold or silver paint pens. These faux spell books can serve as unique decorations or even functional notebooks.
Crafting a collection of sinister spell books is a spellbinding project that adds a touch of dark mystique to your Halloween decor. Transforming ordinary hardcover books into enchanting tomes straight from a witch’s lair is a creative endeavor that allows you to infuse your space with an eerie, gothic charm. Here’s how to delve deeper into this bewitching idea:
1. Thrifted Treasures: Begin your quest by scouring thrift stores, secondhand bookshops or your own bookshelves for hardcover books with the right size and thickness. These will serve as the canvas for your sinister spell books. The more weathered and vintage they look, the better.
2. Dark, Enigmatic Colors: Embrace the darkness by painting your selected books in a palette of deep and rich colors. Consider hues like velvety black, mysterious burgundy or forest green. Apply multiple coats to achieve a smooth and saturated finish, allowing each layer to dry completely before adding another.
3. Enigmatic Titles and Symbols: Once your books are coated in their eerie colors, it’s time to give them sinister titles and symbols. Use gold or silver paint pens to add cryptic names like “Grimoire of Shadows” or “Cursed Incantations.” Incorporate mystical symbols, runes or pentacles to further enhance the aura of mysticism.
4. Distressed Aesthetics: To create an aged and weathered appearance, lightly distress the painted covers with sandpaper. Focus on the edges and corners, revealing hints of the original book’s color beneath the dark facade. This adds an authentic touch and a sense of history to your faux spell books.
5. Decorative Bindings: Enhance the authenticity of your sinister spell books by creating decorative bindings. Use narrow strips of leather or faux leather material to wrap around the spine and secure with glue or adhesive. This detail mimics the look of ancient tomes and adds a tactile element to your creations.
6. Spell Pages: For an added layer of detail, consider adding pages with handwritten spells or incantations to some of your spell books. You can write these yourself or find printable templates online. Glue or tape the pages into the books, ensuring they peek out slightly from the edges for an authentic appearance.
7. Display and Arrangement: Arrange your collection of sinister spell books strategically throughout your Halloween decor. Place them on bookshelves, display stands or even stacked as a centerpiece on a table. Consider surrounding them with candles, crystal balls, potion bottles and other mystical decor to complete the witch’s lair ambiance.
8. Functional Magic: Don’t limit your faux spell books to mere decorations. You can transform them into functional notebooks or journals by adding blank or lined pages inside. These can serve as guest books, journals for your Halloween party or unique gifts for fellow Halloween enthusiasts.
9. Interactive Elements: Encourage guests to explore your sinister spell books by leaving them open to random pages or incorporating them into Halloween games or scavenger hunts. These interactive elements can add an engaging and mysterious dimension to your Halloween festivities.
10. Personalized Touch: Tailor your sinister spell books to your personal style and Halloween theme. You can incorporate specific symbols, colors or titles that resonate with your interpretation of witchcraft or the supernatural.
Crafting a collection of sinister spell books allows you to infuse your Halloween decor with a sense of enchantment, mystery and gothic elegance. These bewitching creations not only serve as captivating decorations but also provide a whimsical and interactive element to your Halloween celebrations, ensuring that every guest who crosses their path becomes enchanted by their dark allure.
To delve further into this matter, we encourage you to check out the additional resources provided here: Amazon.com: Tuitessine Blood Splatter Knife Halloween Bookmarks …
Mysterious Potion Bottles
Craft a set of mysterious potion bottles to adorn shelves or tables. Collect various glass bottles with cork stoppers and fill them with colored liquids like water and food coloring. Add spooky labels that read “Eye of Newt,” “Witch’s Brew,” or “Dragon’s Blood.” These decorative bottles create an authentic and magical atmosphere, making them an excellent DIY gift choice.
Crafting a set of mysterious potion bottles is a creative and fun DIY project that can add an enchanting touch to your Halloween decor. Here’s how to take this idea to the next level and create a captivating display of mystical elixirs:
Variety of Bottles: Gather an assortment of glass bottles in different shapes and sizes to create visual interest. You can find these at thrift stores, antique shops or even repurpose empty glass containers from your kitchen.
Colored Liquids: Fill the bottles with colored liquids to give them an otherworldly appearance. Water and food coloring work well for this purpose. Experiment with different shades to create a diverse collection of potion bottles. Consider deep purples, emerald greens and blood-red hues to evoke a magical atmosphere.
Spooky Labels: Design or print out labels for your potion bottles with whimsical and eerie names like “Eye of Newt,” “Witch’s Brew,” “Dragon’s Blood,” or “Ghostly Elixir.” You can find printable labels online or create your own using aged paper for an authentic look.
Weathered Finish: Give your potion bottles an aged appearance by distressing the labels and bottles themselves. You can lightly sand the labels, tear the edges and stain them with tea or coffee to create a weathered effect. Similarly, you can sand the glass bottles to remove some of the shine.
Cork Stoppers: Secure the bottles with cork stoppers to maintain an authentic look. You can also seal them with wax for added charm. Be sure to label each cork with the corresponding potion name for easy identification.
Additional Embellishments: Enhance the bottles with additional embellishments like twine, ribbon or leather cord. Wrap these materials around the necks of the bottles, adding texture and visual appeal.
Display Setup: Arrange your potion bottles on shelves, mantels or tables. Group them together in clusters or place them among other Halloween decor items like candles, spellbooks or cauldrons for a thematic and cohesive display.
Lighting Effects: Illuminate your potion bottles with LED tea lights or fairy lights placed strategically behind or around them. The soft, flickering glow will enhance the magical ambiance of your display.
Interactive Elements: Create a potion-making station for your Halloween gathering where guests can mix their own “potions” using colored liquids and decorative bottles. Provide ingredients like glitter, small trinkets and stirring sticks for added fun.
Personalized Touch: Consider customizing some of the potion labels with names or initials of your guests and offer them as party favors. It’s a thoughtful and unique gift choice that ties into your Halloween decor theme.
Crafting and displaying mysterious potion bottles is a wonderful way to infuse your Halloween decor with an authentic and magical atmosphere. Whether used as decorative elements, party favors or conversation starters, these DIY creations will undoubtedly add a touch of enchantment to your Halloween celebrations, making them all the more memorable.
Don’t stop here; you can continue your exploration by following this link for more details: A Most Excellent Display! So many small ideas within! scene by …
Creepy Cloth Coasters
Craft fabric coasters that feature eerie prints or patterns. You can use fabric paint to create ghostly apparitions, haunted houses or ominous trees on the coasters. Alternatively, choose fabric with Halloween-themed designs and cut them into square or circular shapes. These handmade coasters add a spooky yet functional touch to any Halloween party or gathering.
Crafting your own Halloween-themed fabric coasters is a creative and personalized way to infuse your decor with a spooky twist. Here are some ideas to help you get started on this DIY project:
1. Ghostly Apparitions: To create ghostly apparitions on your fabric coasters, consider using white fabric paint on a dark-colored background. Use a fine paintbrush to depict ethereal figures with flowing drapery and eerie facial expressions. These ghostly coasters will certainly spark conversation and intrigue among your guests.
2. Haunted Houses: Capture the essence of haunted houses by painting eerie mansions with crooked windows and gnarled trees on your fabric coasters. Choose a black or dark gray background to accentuate the sinister atmosphere. The intricate details of your haunted house coasters will leave your guests spellbound.
3. Ominous Trees: Depicting ominous trees with gnarled branches reaching out like skeletal fingers can add a chilling element to your coasters. Use shades of gray, black and deep brown to create a spooky, moonlit forest on your fabric. These coasters will evoke a sense of foreboding that perfectly fits the Halloween mood.
4. Halloween-Themed Fabric: If you prefer a quicker option, select fabric with pre-printed Halloween-themed designs. You can find fabrics featuring pumpkins, bats, witches or spiders. Simply cut them into square or circular shapes and finish the edges with a sewing machine or fabric glue for a polished look. This way, you can create a variety of coasters with different designs.
Not only do these handmade coasters add a spooky touch to your Halloween party, but they also serve a practical purpose by protecting your surfaces from drink condensation. Plus, they make for fantastic conversation starters as your guests admire the craftsmanship and creativity behind each coaster. So, roll up your sleeves, embrace your inner artist and get ready to craft coasters that will elevate your Halloween gathering to a whole new level of eerie elegance.
Additionally, you can find further information on this topic by visiting this page: 8 Pcs 5D Diamond Painting Coaster Kits-DIY … – Amazon.com
DIY Delights for Halloween Enthusiasts
Handmade Halloween gifts add a personal and creative touch to the holiday season. Creepy crafts like macabre mason jar lanterns, creepy crawly candle holders and ghastly ghoulish garlands allow DIY enthusiasts to embrace the spirit of Halloween in their creations. Whether you’re gifting these items to friends, family or fellow crafters, you’re sharing the magic of DIY and the enchantment of the season. So, this Halloween, roll up your sleeves, gather your materials and let your creativity flow as you craft unique and spooky gifts that are sure to delight and bewitch. Happy crafting!
Handmade Halloween gifts add a personal and creative touch to the holiday season. Creepy crafts like macabre mason jar lanterns, creepy crawly candle holders and ghastly ghoulish garlands allow DIY enthusiasts to embrace the spirit of Halloween in their creations.
Start by collecting the essential crafting materials—mason jars, paint, brushes, googly eyes, felt and other spooky embellishments. For macabre mason jar lanterns, paint eerie scenes or haunting faces on the jars and insert a candle or battery-operated light to illuminate the darkness. For creepy crawly candle holders, attach plastic spiders or bugs to candlesticks, giving a spine-chilling vibe to any room. And for a ghoulish garland, cut out ghostly shapes from felt or fabric, stringing them together to create a spectral decoration.
Whether you’re a seasoned DIY enthusiast or just starting, these projects offer an opportunity to experiment and get into the Halloween spirit. They’re also wonderful activities to do with friends or family, fostering a sense of togetherness and creativity during this magical season.
Consider packaging your handmade creations in themed boxes or wrapping paper to enhance the spookiness. Attach a personal note, adding a heartfelt touch to your unique Halloween gifts. Whether you’re gifting these items to friends, family or fellow crafters, you’re sharing the magic of DIY and the enchantment of the season.
So, this Halloween, roll up your sleeves, gather your materials and let your creativity flow as you craft unique and spooky gifts that are sure to delight and bewitch. Happy crafting! May your handmade Halloween gifts bring joy and a touch of the supernatural to all who receive them.
Should you desire more in-depth information, it’s available for your perusal on this page: Halloween Wishes: What to Write in a Halloween Card | Hallmark …
More links
To delve further into this matter, we encourage you to check out the additional resources provided here: DIY Halloween decorations – 3 ideas for the Halloween party