
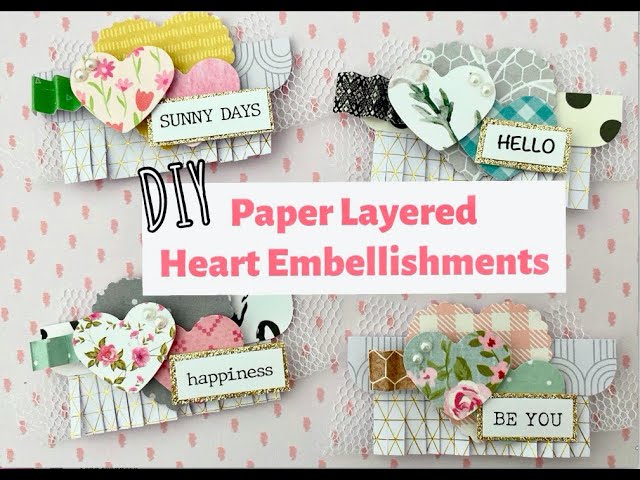
Table of Contents
- The Personal Touch of DIY Embellishments
- Materials for DIY Embellishments
- Paper and Cardstock
- Fabric and Textiles
- Buttons and Beads
- Natural Elements
- Stamps and Ink
- DIY Embellishment Ideas
- Handmade Flowers
- Stamped Tags
- Button Bouquets
- Fabric Banners
- Origami Accents
- Layered Paper Frames
- Tips for DIY Embellishments
- Experiment and Have Fun
- Keep It Cohesive
- Precision Matters
- Document Your Process
- Share the Love
- A Unique Legacy
Scrapbooking is more than just preserving memories; it’s a creative journey that allows you to infuse your unique personality into every page. While there are countless embellishments available in craft stores, there’s something truly special about creating your own DIY embellishments. In this article, we’ll explore the world of DIY embellishments and discover how they can add a one-of-a-kind touch to your scrapbook pages.
Scrapbooking is more than just preserving memories; it’s a creative journey that allows you to infuse your unique personality into every page. While there are countless embellishments available in craft stores, there’s something truly special about creating your own DIY embellishments. In this article, we’ll explore the world of DIY embellishments and discover how they can add a one-of-a-kind touch to your scrapbook pages.
One of the most exciting aspects of DIY embellishments is the sheer versatility and freedom they offer. When you create your own embellishments, you’re not limited to what’s commercially available. Instead, you can tailor each piece to suit the specific theme, color palette and mood of your scrapbook page. Whether it’s a vintage-inspired button, a hand-painted watercolor element or a customized stamped image, the possibilities are endless.
Furthermore, crafting your own embellishments adds a deeply personal touch to your scrapbook pages. Each embellishment becomes a reflection of your creativity and artistic sensibilities. Whether you’re a seasoned crafter or a beginner, the process of making your own embellishments allows you to experiment, learn and develop your crafting skills. It’s a rewarding journey of self-expression.
DIY embellishments also enable you to repurpose materials and reduce waste. You can use scraps of paper, fabric remnants, buttons, ribbons and other odds and ends from previous projects to create unique embellishments. This eco-friendly approach not only adds character to your scrapbook pages but also contributes to sustainable crafting practices.
Moreover, crafting your own embellishments can be a collaborative and bonding experience. You can involve family members or friends in the creative process, making it a shared project that captures collective memories and stories. This collaborative aspect of DIY embellishments can be especially meaningful when creating scrapbooks for special occasions or family events.
In the end, DIY embellishments are more than just decorative elements; they are a testament to your creativity and the effort you invest in preserving your cherished memories. They add a personal, handcrafted dimension to your scrapbook pages that can’t be replicated with store-bought embellishments alone. So, embrace the world of DIY embellishments and embark on a creative journey that not only enhances your scrapbooking but also allows you to leave a lasting mark of your own unique style and personality on each page.
You can also read more about this here: August 2023 Hip Kit Club Embellishment Scrapbook Kit | Sunshine …
The Personal Touch of DIY Embellishments
When you embark on the adventure of crafting DIY embellishments, you’re not just adding decorative elements to your scrapbook pages; you’re embedding a piece of yourself into each creation. These handmade embellishments carry your creative energy, making them a personal and heartfelt addition to your memory book.
When you embark on the adventure of crafting DIY embellishments, you’re not just adding decorative elements to your scrapbook pages; you’re embedding a piece of yourself into each creation. These handmade embellishments carry your creative energy, making them a personal and heartfelt addition to your memory book.
Each DIY embellishment tells a story of its own. Whether you’re meticulously hand-stitching delicate felt flowers, carefully layering vintage buttons and lace or painting intricate designs on small wooden accents, you’re infusing your unique touch into every detail. These embellishments become more than mere decorations; they become tiny time capsules, encapsulating the mood, inspiration and passion you felt during the creative process.
The beauty of crafting your own embellishments lies not only in their personalization but also in their limitless possibilities. You’re not confined to store-bought designs; you have the freedom to experiment with materials, colors and textures, allowing your imagination to run wild. This creative freedom enables you to perfectly match the embellishments to the theme and mood of your scrapbook pages, ensuring that every element harmonizes and enhances your storytelling.
Moreover, crafting DIY embellishments can be a therapeutic and mindful experience. As you engage in the creative process, you enter a state of flow, where time seems to stand still and your focus is solely on the project at hand. This mindful crafting can be a soothing and rejuvenating practice, allowing you to disconnect from the hustle and bustle of daily life and immerse yourself in a world of colors, textures and imagination.
Furthermore, sharing your scrapbook adorned with DIY embellishments can be a heartfelt gift to loved ones. When they flip through the pages and see the intricate details and personalized touches, they’ll not only appreciate the memories but also the effort and love that went into creating the scrapbook.
In summary, crafting DIY embellishments for your scrapbook is a creative journey that goes beyond aesthetics. It’s a profound way to infuse your personality, passion and memories into every page. Each embellishment is a labor of love, a testament to your creativity and a lasting reminder of the joy of crafting and preserving cherished moments. So, let your imagination run free, gather your crafting supplies and embark on this creative adventure that will make your memory book truly one of a kind.
To delve further into this matter, we encourage you to check out the additional resources provided here: 30 Best DIY Wedding Decorations to Give Your Day a Personal Touch
Materials for DIY Embellishments
One of the beauties of DIY embellishments is their versatility. You can craft them from a wide range of materials, many of which you might already have at home. Here are some common materials to consider:
The allure of DIY embellishments lies not only in their ability to add a personal touch to your projects but also in their remarkable versatility. Crafting your own embellishments offers endless creative possibilities and the best part is that you can often fashion them from materials readily available in your own home. Let’s delve into some of the common materials that can serve as the foundation for your creative endeavors:
Paper: Paper is a DIY enthusiast’s best friend. Whether you’re working with old magazines, newspapers, scrapbook paper or even plain cardstock, paper can be transformed into a plethora of embellishments. Think paper flowers, intricate origami shapes or delicate paper cutouts.
Fabric Scraps: Those leftover fabric scraps from previous sewing projects can be repurposed into charming embellishments. Consider making fabric flowers, bows or small fabric rosettes to add a soft and tactile dimension to your creations.
Buttons: Buttons are not just functional; they are delightful embellishments too. Raid your button stash and use them as colorful centers for your paper or fabric flowers or even as standalone accents on your projects.
Ribbons and Trims: Ribbons and decorative trims can instantly elevate your projects. Use them as borders, create bows or fashion them into cute ribbon rosettes to lend a touch of elegance to your designs.
Beads and Sequins: If you have a collection of beads or sequins lying around, put them to good use by incorporating them into your embellishments. They can add a touch of sparkle or texture, making your projects shine.
Recycled Materials: Get creative with recycled materials like bottle caps, cardboard or even old jewelry pieces. Upcycling these items can lead to unique and eye-catching embellishments that tell a story of their own.
Stamps and Ink: Don’t underestimate the power of stamps and ink. With these tools, you can create custom patterns, images or text on your embellishments, adding a personalized touch to your projects.
Natural Elements: Venture outdoors to find natural elements like leaves, twigs or even seashells. These can be incorporated into your designs, bringing a touch of the outdoors to your crafting.
Photos and Magazine Cutouts: Images from old magazines, postcards or your own photographs can become striking embellishments. Consider using them as focal points or layered elements in your projects.
Washi Tape: Washi tape is not just for adhering; it can also be creatively used as an embellishment. Tear or cut it into shapes, borders or even tiny flags to add color and pattern.
The beauty of DIY embellishments lies in their ability to transform ordinary materials into extraordinary accents. Whether you’re looking to enhance your scrapbook pages, greeting cards or other creative projects, these common materials offer a world of possibilities. So, let your imagination run wild and don’t be afraid to experiment with different materials to craft embellishments that truly reflect your unique style and vision.
Looking for more insights? You’ll find them right here in our extended coverage: Scrapbooking Supplies: Tools and Embellishments We are …
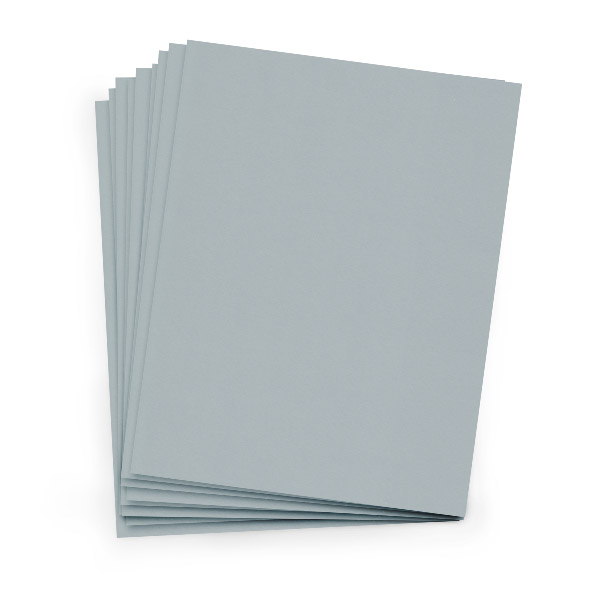
Paper and Cardstock
The most accessible materials for DIY embellishments, paper and cardstock can be cut, folded and shaped to create various embellishments.
Certainly, let’s dive deeper into the creative possibilities that paper and cardstock offer when it comes to crafting DIY embellishments:
Paper and Cardstock: The Versatile Canvas of DIY Embellishments
Paper and cardstock, often considered the fundamental building blocks of DIY embellishments, are versatile materials that can transform into a myriad of decorative elements. Whether you’re a seasoned scrapbooker or just starting your crafting journey, these materials are your trusted companions for adding unique touches to your scrapbook pages.
1. Dimensional Paper Flowers:
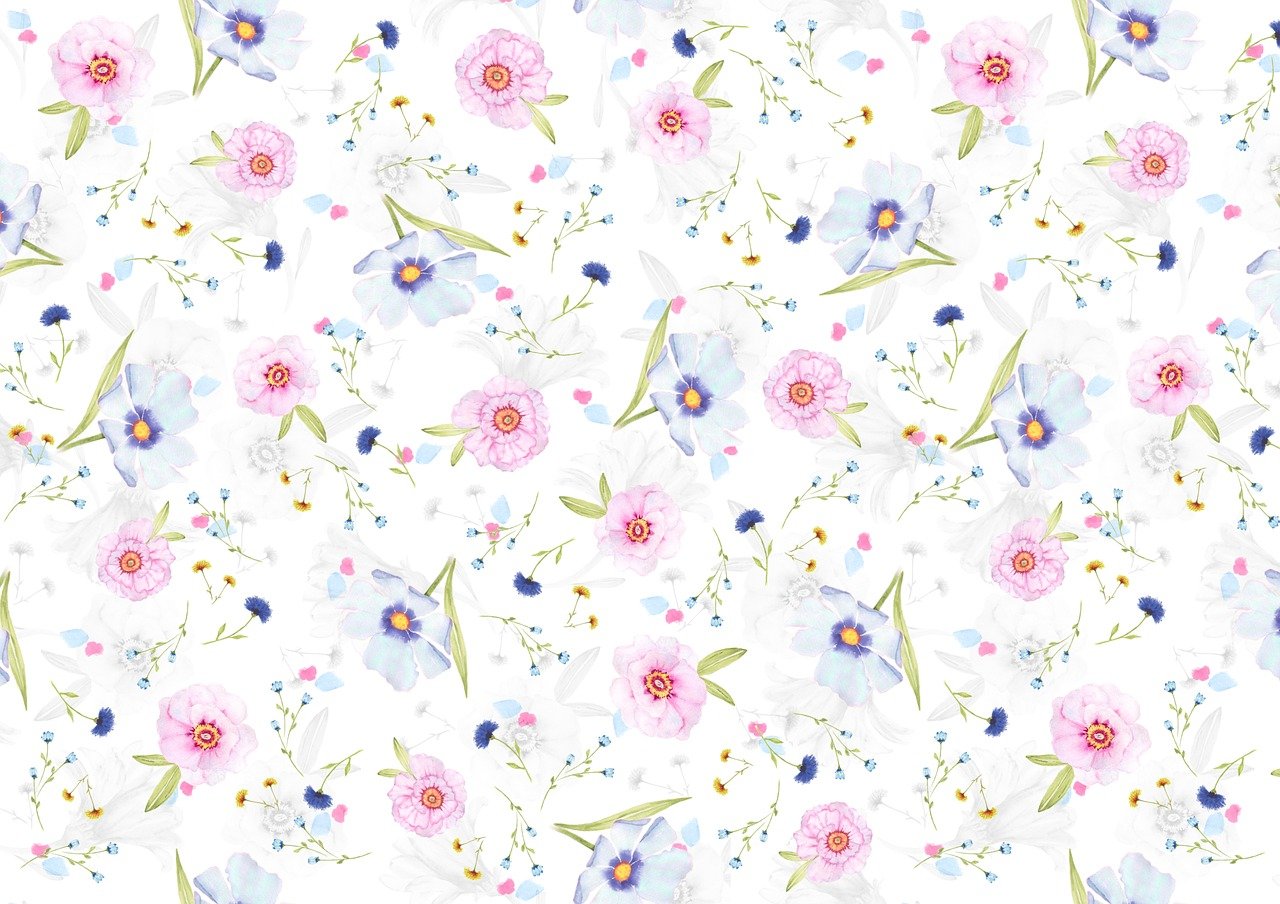
With a few simple folds, twists and a touch of adhesive, paper can blossom into exquisite dimensional flowers. Create delicate rosebuds, cheerful daisies or elaborate peonies by layering and shaping paper petals. Add a dash of color with ink or watercolors and your handmade floral embellishments will breathe life into your layouts.
2. Quirky Paper Butterflies:
Folded paper butterflies are whimsical additions to any page. Experiment with different sizes and patterns to match your theme. These charming insects can be perched on a page corner, seemingly ready to take flight and carry your memories along with them.
3. Pocket-Style Tags:
Cut cardstock into small rectangular or shaped tags to replicate the look of journaling cards. Use these tags to tuck away hidden messages, extra photos or small mementos within pockets on your scrapbook pages. They not only add a functional aspect but also introduce a delightful interactive element.
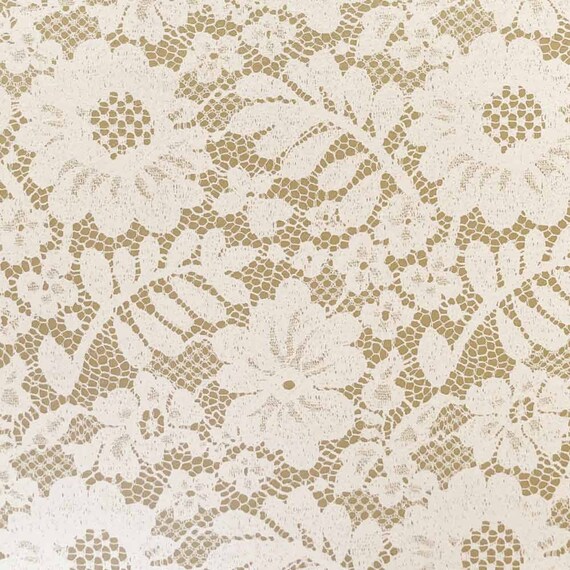
4. Intricate Paper Lace:
Delicate lace patterns can be achieved by carefully cutting intricate designs into paper or cardstock. Layer these lace patterns as overlays on your pages to create a vintage, romantic feel. These DIY lace embellishments exude elegance and grace, enhancing the overall aesthetic of your scrapbook.
5. Pop-Up Elements:
Cardstock is the perfect material for crafting pop-up elements that surprise and engage viewers. Create charming pop-up characters, sentiments or even mini scenes that jump off the page when the scrapbook is opened. These dynamic additions add a playful dimension to your layouts.
6. Paper Borders and Frames:
Transform strips of decorative paper or cardstock into elegant borders and frames. These can be used to highlight photos or create visual separation between sections of your page. Decorate these borders with ink, stamps or other embellishments for a custom look.
7. Whimsical Paper Silhouettes:
Cutting out silhouettes from paper or cardstock can be an enchanting way to add storytelling elements to your pages. Create silhouettes of family members, pets or objects related to your memories. These silhouettes not only capture the essence of your story but also add an artistic flair.
8. Geometric Paper Accents:
Embrace the beauty of clean lines and geometric shapes by cutting precise triangles, circles or rectangles from cardstock. These shapes can be layered or arranged in patterns to create a modern and contemporary look in your scrapbook designs.
9. Personalized Lettering:
Craft custom titles, quotes or sentiments by cutting out letters from colored paper or cardstock. You can experiment with different fonts, sizes and colors to match the theme and mood of your page. Hand-cut lettering adds a personal touch to your layouts.
10. Interactive Flaps and Folds:
Paper and cardstock are perfect for creating interactive elements like flaps, flip-outs or folding panels. These features can hide surprises, additional photos or journaling that can be revealed as the page is explored, adding an element of discovery to your scrapbook.
In conclusion, paper and cardstock are not just the foundation of DIY embellishments; they are the artists’ canvas, waiting to be transformed into unique and imaginative elements that breathe life into your scrapbook pages. So, let your creativity run wild and let these versatile materials be your muse as you craft DIY embellishments that infuse your memories with a personal touch and artistic flair.
Should you desire more in-depth information, it’s available for your perusal on this page: Products – Page 3 – American Crafts
Fabric and Textiles
Fabric scraps, lace, ribbons and even old clothing can be repurposed into charming embellishments.
Unleash your creativity in the world of scrapbooking by turning everyday textiles and fabric scraps into delightful embellishments that breathe life into your pages.
Textile Treasures: Fabric scraps are more than remnants of old clothes or linens; they’re a treasure trove of textures, colors and patterns waiting to be rediscovered. Delve into your fabric stash and you’ll find a world of possibilities. The softness of cotton, the elegance of lace and the sheen of satin all bring unique qualities to your designs.
Lace: A Touch of Elegance: Lace, with its intricate patterns and delicate charm, can add a touch of timeless elegance to your scrapbook pages. Whether used as a border, a backdrop or as dainty embellishments, lace infuses a sense of romance and vintage allure into your creations. It’s the perfect choice for documenting weddings, anniversaries or cherished family memories.
Ribbons: Versatile Accents: Ribbons are the unsung heroes of scrapbooking. They’re versatile, adding color, texture and dimension to your layouts. Use them to frame photos, create bows or even as page markers for mini albums. Satin, grosgrain or even rustic burlap ribbons can convey a wide range of themes and moods, from formal to rustic.
Upcycling Old Clothing: Don’t overlook the sentimental value of repurposing old clothing, such as baby clothes or beloved t-shirts, into embellishments. Cut out shapes, letters or even entire designs to personalize your pages. This not only adds a personal touch but also transforms cherished garments into a lasting tribute.
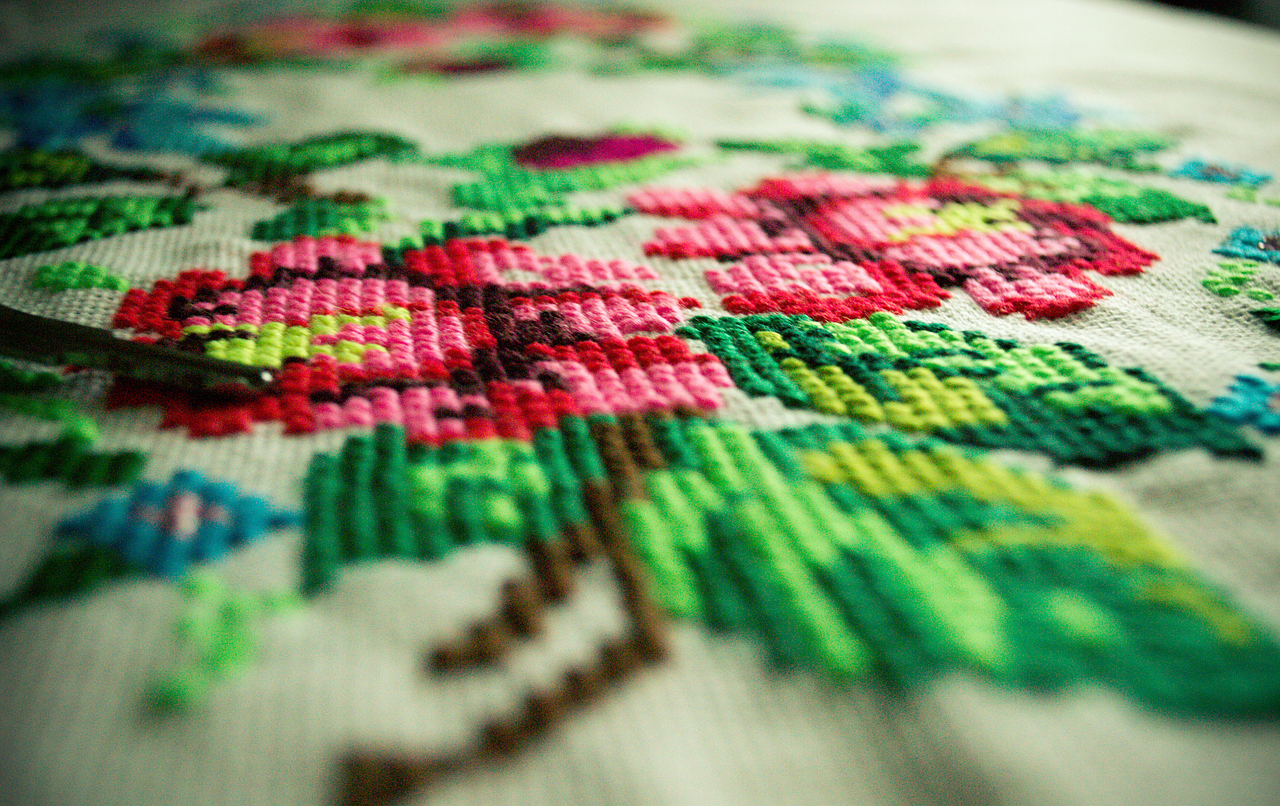
Stitching and Sewing: If you’re handy with a needle and thread, consider incorporating stitching and sewing into your designs. Running stitches along the edges of fabric or ribbon can create a homespun, handmade feel. For a more elaborate touch, use embroidery to add intricate patterns or text that complements your story.
Mixed Media Magic: Don’t limit yourself to using fabric in isolation. Combine it with other mixed media elements, such as paint, ink or collage, to create multidimensional masterpieces. Mixed media techniques allow you to push the boundaries of your creativity and craft truly unique and artistic pages.
Preserving Memories in Fabric: The tactile nature of fabric adds an extra layer of sensory richness to your scrapbooks. When you run your fingers over a piece of repurposed fabric or lace, you’re not just seeing a memory; you’re feeling it too. It’s a tangible connection to the past that enhances the storytelling aspect of your pages.
Incorporating fabric, lace, ribbons and repurposed textiles into your scrapbooking arsenal opens up a world of creative possibilities. These materials add depth, character and a touch of nostalgia to your layouts. So, the next time you’re pondering how to infuse your pages with charm and personality, raid your fabric stash or upcycle old clothing. You’ll discover that the simplest materials can become extraordinary embellishments in the world of scrapbooking.
To expand your knowledge on this subject, make sure to read on at this location: Amazon.com: MOLNESO Scrapbook Lace Frames 60pcs, Vintage …
Buttons and Beads
Raid your button jar or bead collection to add dimension and texture to your creations.
Raid your button jar or bead collection to add delightful dimension and irresistible texture to your creative projects. These tiny treasures can work wonders in elevating the visual appeal of your crafts.
Buttons, with their diverse shapes, colors and sizes, are like miniature works of art waiting to be discovered. They can be used to embellish a variety of projects, from scrapbook layouts to handmade cards and fabric art. The act of selecting the perfect button for each project can be a joyful experience in itself, allowing you to express your creativity and attention to detail.
Beads, on the other hand, offer an endless array of possibilities. From glass beads that shimmer like gemstones to wooden beads that add a rustic touch, they can be threaded onto strings, wires or even glued onto surfaces. Beads can be incorporated into jewelry-making, embroidery and mixed-media art, providing both texture and visual interest.
When strategically placed, buttons and beads can become focal points, drawing the viewer’s eye and adding depth to your creations. They can be used to form patterns, accents or even as functional closures for journals and albums. The tactile experience of running your fingers over these embellishments can add a sensory dimension to your work, making it not only visually appealing but also engaging on a physical level.
Moreover, incorporating buttons and beads into your projects is a sustainable and cost-effective way to breathe new life into your crafting supplies. You can upcycle old garments by repurposing buttons or add beads to plain fabric to transform it into a unique textile art piece. This eco-friendly approach not only enhances your creations but also contributes to a more sustainable crafting practice.
Incorporating buttons and beads into your creative endeavors opens a world of possibilities for adding character, charm and personality to your work. So, next time you embark on a crafting adventure, remember to raid your button jar or bead collection to infuse your projects with a touch of texture, dimension and creative flair.
Should you desire more in-depth information, it’s available for your perusal on this page: 50 Homemade Crafts For Kids to Make & Sell (2023) – Milwaukee …
Natural Elements
Incorporate dried flowers, leaves, twigs or seashells to give your pages a natural, organic feel.
Adding natural elements such as dried flowers, leaves, twigs or seashells to your creative projects is like inviting a touch of Mother Nature’s beauty and serenity into your designs. These organic elements offer a unique and authentic charm that can elevate your pages to a whole new level.
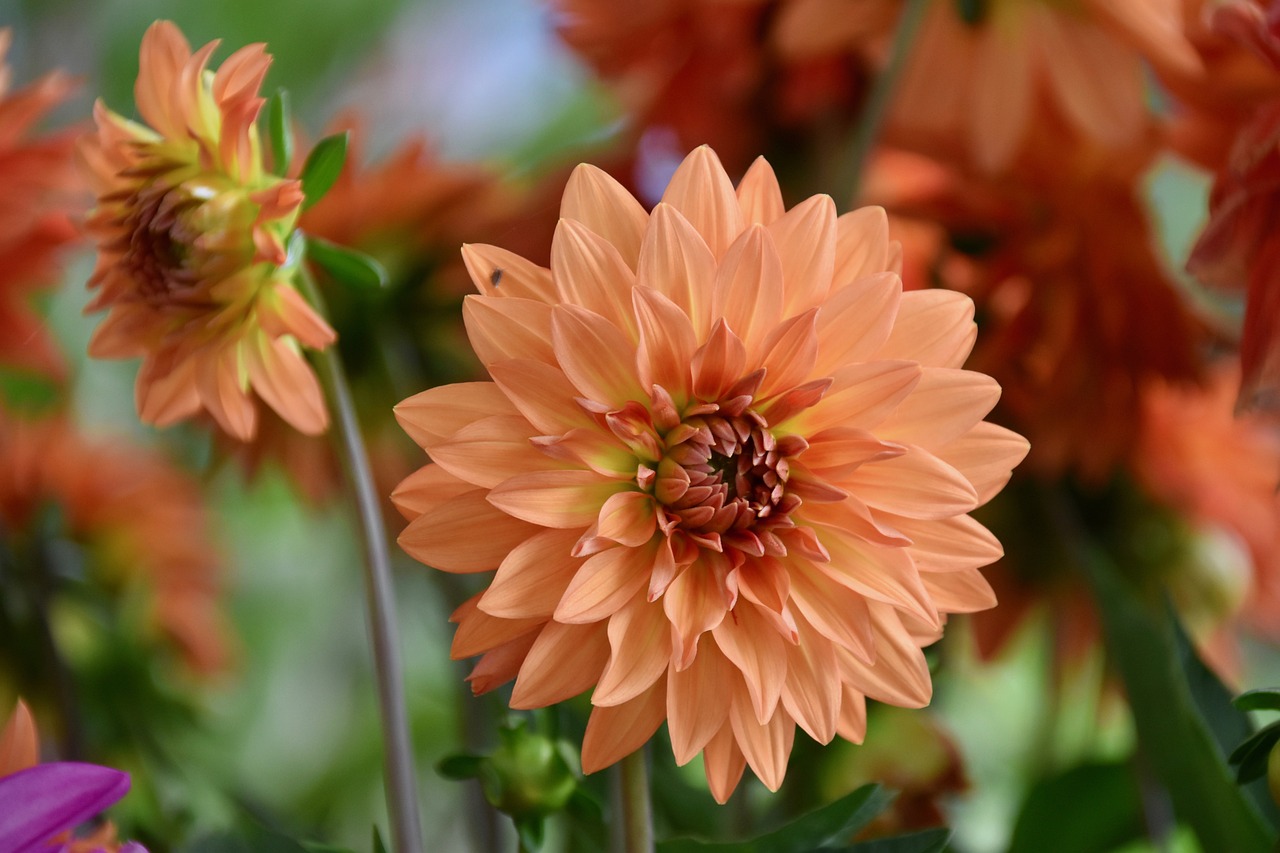
Dried flowers, for instance, bring a sense of timeless elegance. Each bloom carries with it the memories of a moment in time, frozen in its delicate petals. Whether it’s a single dried rosebud or an assortment of wildflowers, these botanical treasures can turn your project into a visual poetry, evoking feelings of nostalgia and grace.
Leaves, on the other hand, are the embodiment of change and renewal. They capture the essence of seasons and cycles, making them a versatile addition to your designs. Use them to frame a photo, create a border or scatter them across your page like the gentle fall of autumn leaves. They symbolize the passage of time and the beauty found in transitions.
Twigs and branches introduce a rustic, earthy element to your creations. They can be artfully arranged to form frames, wreaths or borders, imparting a touch of woodland charm. These natural accents can evoke feelings of warmth and comfort, as if you’re nestled in a cozy cabin deep in the forest.
Seashells, with their exquisite shapes and textures, transport us to tranquil shores and coastal escapes. They add a touch of beachside allure to your designs, whether you’re creating a beach vacation scrapbook or simply capturing the essence of seaside serenity. Each shell tells a story of the sea, making it a wonderful addition to travel-themed projects.
Incorporating these natural elements not only adds a tactile dimension to your work but also infuses it with a sense of authenticity and connection to the natural world. These elements have the power to engage the senses, allowing viewers to not only see but also touch and feel the textures of your design.
Moreover, using natural elements is a sustainable and eco-friendly choice, as it repurposes materials from the environment around us. It’s a beautiful way to honor and celebrate the beauty of the Earth in your creative endeavors.
So, whether you’re crafting a scrapbook, creating greeting cards or designing home decor, consider the beauty of dried flowers, leaves, twigs or seashells. They have the remarkable ability to infuse your projects with a touch of the outdoors, reminding us of the beauty and wonder that can be found in the natural world.
Looking for more insights? You’ll find them right here in our extended coverage: What to Put in a Scrapbook and What to Avoid

Stamps and Ink
Experiment with stamping and coloring to create custom embellishments that match your page’s color scheme.
Experimenting with stamping and coloring offers an exciting opportunity to craft custom embellishments that seamlessly blend with your page’s chosen color scheme, allowing you to infuse a unique and harmonious aesthetic into your creative projects.
Imagine you’re working on a scrapbooking page, a greeting card or even a piece of digital art. You’ve carefully chosen a color palette that evokes the mood and theme you want to convey. Now, take your creativity to the next level by designing embellishments that not only complement but enhance your overall vision.
Stamping becomes your artistic medium. You select stamps that align with the theme or message of your project, whether it’s delicate florals, whimsical patterns or bold geometric shapes. These stamps serve as the foundation for your custom embellishments, offering a structure to build upon.
As you ink up your chosen stamps, you have the creative freedom to select ink colors that precisely match your chosen palette. This is where the magic begins. With each stamp impression, you transfer not only the design but also the essence of your chosen colors onto your embellishment.
Now, it’s time to add depth and dimension. You might opt for different shades and tones within your color scheme to create highlights and shadows. Techniques like gradient coloring or ink blending can turn a flat stamped image into a dynamic, multi-dimensional element.
To further customize your embellishments, consider adding intricate details. This could involve hand-coloring specific areas, applying embossing powder for texture or incorporating other mixed media elements like watercolors or colored pencils.
The result is a collection of bespoke embellishments that harmonize with your page’s color scheme in a way that store-bought decorations simply can’t replicate. They become an integral part of your creative narrative, enhancing the visual impact of your project and making it uniquely yours.
Not only does this process allow you to exercise your artistic prowess, but it also ensures that every element on your page is in perfect harmony, from the background to the embellishments. Your work becomes a cohesive masterpiece, where every color choice, every stamped image and every detail contributes to a unified and visually pleasing whole.
In essence, experimenting with stamping and coloring to create custom embellishments is like composing a symphony of colors and designs that resonate with your artistic vision. It transforms your creative projects into personalized works of art, where the intricacies of your color scheme and the charm of your embellishments combine to tell a beautiful and cohesive story.
For additional details, consider exploring the related content available here Papercrafting | Make It from Your Heart

DIY Embellishment Ideas
Now that you have an idea of the materials you can use, let’s explore some DIY embellishment ideas to get your creative juices flowing:
Now that you’ve familiarized yourself with the wide array of materials at your disposal, it’s time to embark on a journey of creative self-expression. Scrapbooking is not just about preserving memories; it’s an art form that allows you to infuse your personality and imagination into every page. To ignite your creative spark, let’s delve into some captivating DIY embellishment ideas that will breathe life into your scrapbook:
Handmade Paper Flowers: Craft delicate, dimensional blooms by layering and shaping paper petals. Experiment with different sizes, colors and shapes to add a touch of elegance and charm to your pages. These paper blossoms can beautifully complement photos of gardens, weddings or any nature-inspired themes.
Stamped and Embossed Elements: Dive into the world of stamping and embossing to create intricate designs on your pages. Custom stamps and embossing powders can add a touch of sophistication. Whether it’s a subtle background pattern or a bold focal point, stamping and embossing offer endless possibilities.
Origami Creations: Fold and manipulate paper to craft origami animals, stars or geometric shapes. Origami adds a dash of whimsy and a unique visual element to your scrapbook. It’s an excellent choice for themes involving travel, culture or celebrations.
Fabric Scraps and Ribbon: Don’t limit your embellishments to paper alone. Incorporate fabric scraps and ribbons for texture and contrast. Create fabric banners, bows or even fabric pockets to tuck in small memorabilia. The tactile quality of fabric adds a delightful sensory dimension to your pages.
Mixed Media Collages: Experiment with mixed media by layering different materials such as paper, fabric, paint and found objects. Collages offer an eclectic and artsy vibe, perfect for capturing unconventional or avant-garde memories.
Washi Tape Art: Washi tape is a versatile and decorative adhesive that comes in countless patterns and colors. Use it to frame photos, create borders or even craft intricate tape designs. Washi tape is an excellent choice for adding playful and contemporary touches to your pages.
Paper Quilling: Roll, shape and glue thin strips of paper to create intricate and whimsical designs. Paper quilling can be used to craft decorative borders, monograms or unique embellishments that lend an air of sophistication to your scrapbook.
Wooden Accents: Incorporate wooden elements such as veneer shapes, buttons or mini clothespins. These rustic touches add warmth and a touch of nostalgia, making them ideal for themes like family gatherings or outdoor adventures.
Handwritten Calligraphy: Elevate your journaling with handwritten calligraphy or lettering. The personal touch of your own handwriting can convey emotions and stories in a way that printed text cannot.
Found Objects and Trinkets: Consider incorporating small found objects or trinkets that hold sentimental value, such as a ticket stub from a memorable concert or a seashell from a beach vacation. These treasures can serve as authentic and meaningful embellishments.
As you embark on your DIY embellishment journey, remember that there are no rules in scrapbooking, only boundless opportunities for creativity. Let your imagination soar, experiment with different techniques and infuse your scrapbook with your unique style and personality. These embellishments are not just decorative; they’re a reflection of your memories, your stories and the artistry of your heart. Happy crafting!
If you’d like to dive deeper into this subject, there’s more to discover on this page: Pin on Embellishment Ideas for Scrapbooking
Handmade Flowers
Craft delicate paper or fabric flowers and layer them for a dimensional effect. Add a button or bead center for extra charm.
Crafting delicate paper or fabric flowers can be a delightful and rewarding creative endeavor and when you take it a step further by layering these blossoms, you open the door to a world of artistic possibilities. Layering flowers not only adds depth and dimension to your projects but also infuses them with a sense of elegance and charm that captivates the eye.
To create layered flowers, you can begin by crafting multiple blooms in various sizes, shapes and colors. Each layer can represent a petal or a distinct flower, allowing you to mix and match different elements to achieve the desired look. Experiment with different types of paper or fabric to create a diverse array of textures and visual appeal.
As you layer the flowers, consider the placement of each element thoughtfully. Overlapping petals and varying the angles at which they overlap can create a more natural and organic appearance. You can attach each layer with a touch of adhesive, glue dots or even a small stitch if you’re working with fabric, ensuring that the layers are securely held together.
To add an extra touch of charm and sophistication, consider embellishing the center of your layered flowers with buttons or beads. These small details not only serve as a focal point but also introduce a delightful tactile element to your creations. Buttons can add a vintage or rustic flair, while beads can bring a touch of sparkle and elegance.
Layered flowers are incredibly versatile and can be incorporated into a wide range of projects. From scrapbook layouts and greeting cards to home decor items like framed art or wreaths, these handmade blooms can elevate your designs and infuse them with a personalized touch.
Moreover, layering flowers allows you to experiment with different color palettes and arrangements, enabling you to tailor your creations to specific themes or occasions. Whether you’re crafting a bouquet of layered paper roses for a romantic wedding card or adding fabric sunflowers to a rustic home decor piece, the possibilities are endless.
In conclusion, crafting layered paper or fabric flowers is a delightful way to enhance your creative projects. The careful assembly of these blooms, with their varied sizes and textures, creates a striking visual impact that adds depth and dimension to your artistry. With the added charm of button or bead centers, your layered flowers become not just decorative elements but also tactile and enchanting focal points. So, let your imagination blossom and explore the world of layered flowers to elevate your crafting endeavors to new heights of beauty and elegance.
For a comprehensive look at this subject, we invite you to read more on this dedicated page: Layered Assorted Paper Flower Embellishments | Hobby Lobby …
Stamped Tags
Create custom tags by stamping your own designs or sentiments onto cardstock. Attach these tags with twine or ribbon to your scrapbook pages.
Crafting custom tags is a delightful and personalized way to add a touch of charm and sentiment to your scrapbook pages. By stamping your own designs or heartfelt messages onto cardstock, you infuse your creations with a unique and handmade quality that truly makes them your own. These custom tags serve as not only decorative elements but also as meaningful additions to your scrapbook narratives.
Stamping your own designs allows for endless creativity. Whether you’re creating tags for a specific theme, such as a birthday celebration or a vacation album or simply adding a personal touch to your pages, the possibilities are boundless. You can select stamps that resonate with your story, whether it’s floral motifs for a garden-themed page, vintage images for a heritage project or whimsical illustrations for a child’s scrapbook. Your imagination is the limit.
Incorporating sentiments onto your custom tags is a wonderful way to convey emotions, memories or messages that hold significance for your scrapbook’s story. These sentiments can range from heartfelt quotes and messages of love to specific details like dates, locations or names. When you attach these tags to your pages, they become like little notes that guide the viewer through your memories, providing context and a personal connection to the moments you’re documenting.
Attaching custom tags with twine or ribbon adds a tactile and visual dimension to your pages. The choice of twine or ribbon can complement the overall theme and style of your scrapbook. For a rustic or vintage feel, opt for twine in earthy tones. For an elegant or romantic look, consider using satin or organza ribbon in soft, coordinating colors. The way you tie or affix these tags can also become part of your creative expression, allowing you to experiment with different knots, bows or placements.
Custom tags not only enhance the aesthetic appeal of your scrapbook but also offer practical benefits. They can serve as interactive elements, allowing you to tuck additional photos or journaling behind them. This hidden layering adds depth and surprise to your pages, encouraging viewers to engage with your memories on a deeper level.
In summary, creating custom tags by stamping your own designs or sentiments onto cardstock is a crafty and heartfelt way to personalize your scrapbook pages. These tags become more than decorative elements; they are storytellers in their own right, guiding viewers through your cherished memories and adding layers of creativity and sentiment. Whether you’re an experienced crafter or a beginner, custom tags provide an avenue for self-expression and a meaningful addition to your scrapbooking journey.
For a comprehensive look at this subject, we invite you to read more on this dedicated page: Tag: papercrafter
Button Bouquets
Arrange a cluster of buttons in the shape of a flower or heart, then glue them onto your layout for a whimsical touch.
Arranging a cluster of buttons in the shape of a flower or heart and then adhering them to your scrapbook layout can infuse it with a delightful and playful charm. This simple yet creative embellishment technique not only adds visual interest but also personalizes your project in a unique way.
1. Whimsy and Personality: The use of buttons in scrapbooking allows you to inject a dose of whimsy and personality into your layout. By arranging them into familiar shapes like flowers or hearts, you create a visual focal point that draws the eye and conveys a specific mood or sentiment. The choice of button colors and sizes can further enhance the character of your design.
2. Textured Dimension: Buttons provide a tactile and dimensional element to your layout. When adhered with care, they can create a subtle but tactile contrast against flat paper surfaces. This textural variation not only looks appealing but also encourages viewers to engage with your layout by touching and feeling the buttons.
3. Storytelling: The shape and arrangement of the buttons can be used to enhance the storytelling aspect of your scrapbook page. For example, a heart-shaped cluster of buttons might be a perfect addition to a page celebrating a romantic relationship or a family’s bond. Similarly, a flower-shaped arrangement could accentuate a page dedicated to a garden party or a springtime adventure.
4. Versatility: Button embellishments are incredibly versatile. You can adapt them to fit various themes, seasons or occasions. Whether you’re creating a layout for a birthday, holiday, travel adventure or everyday life, buttons can be customized to suit the theme, making them a valuable addition to your scrapbooking toolkit.
5. DIY Creativity: This button-cluster technique also invites your DIY creativity. You can mix and match button colors, shapes and sizes to create a design that resonates with your personal style and complements your photos. You might even choose to use vintage or themed buttons to evoke a particular era or mood.
6. Securing Techniques: When adhering your button clusters, consider using strong adhesive or even stitching them in place for added durability. This ensures that your whimsical embellishments remain securely attached to your layout, preserving your design over time.
Incorporating button clusters in the shape of flowers, hearts or other creative motifs into your scrapbooking layouts can transform them from ordinary to extraordinary. It’s a crafty and enjoyable way to infuse a touch of whimsy, texture and storytelling into your projects, making your memories come to life on the page. So, let your imagination bloom as you arrange these charming button clusters and watch your scrapbook pages flourish with character and personality.
For additional details, consider exploring the related content available here Scrapbook Embellishments and How to Use Them | Altenew Blog
Fabric Banners
Cut small triangles from fabric scraps and string them together to make adorable mini banners to adorn your pages.
Certainly! Here’s an extended idea:
“Cutting small triangles from fabric scraps can be a delightful and sustainable crafting project. These adorable mini banners not only adorn your pages but can also serve as versatile decorative elements for various occasions. You can choose fabrics that match your desired theme or color scheme. Add a personal touch by embellishing the triangles with embroidery, fabric paint or even iron-on transfers for unique designs. These mini banners can be used not only in scrapbooking but also to decorate greeting cards, gift boxes or even as charming accents for home décor. They make for a fun and eco-friendly way to repurpose fabric scraps and infuse creativity into your projects, adding a touch of handmade charm to any setting.”
Should you desire more in-depth information, it’s available for your perusal on this page: Scrapbook Embellishments and How to Use Them | Altenew Blog

Origami Accents
Fold colorful origami shapes like cranes, stars or hearts to add an element of surprise to your pages.
Infusing your scrapbook pages with the charm of origami creations is a delightful way to introduce an element of surprise and artistry. Origami, the traditional Japanese art of paper folding, offers a treasure trove of possibilities for enhancing your pages with intricate and visually captivating designs.
Cranes of Inspiration: Origami cranes, with their graceful forms and timeless symbolism, can elevate the aesthetic of your scrapbook. Folded in vibrant hues or delicate patterns, they can symbolize hope, peace and endurance. These cranes can be thoughtfully placed on a page to draw the viewer’s eye and evoke emotions that resonate with your story.
Starry Embellishments: Origami stars, also known as lucky stars or wishing stars, bring an ethereal touch to your pages. Their tiny, three-dimensional presence can add a touch of magic to your storytelling. You can create a cascading effect by stringing them together or sprinkle them like celestial confetti to enhance the overall visual appeal.
Heartfelt Gestures: Origami hearts convey love, affection and warmth. Folding them from patterned or textured paper can evoke nostalgia and add a personal touch to your scrapbook. These hearts can be strategically placed near cherished photos or handwritten notes, underscoring the sentiment you wish to convey.
Unexpected Elements: The beauty of origami lies in its ability to surprise and delight. Consider incorporating hidden origami pockets or envelopes into your pages, containing small notes, mementos or additional photos. These unexpected discoveries can create a sense of intrigue and engagement for those exploring your scrapbook.
Customization: Origami offers limitless possibilities for customization. You can select paper that complements your overall theme or color scheme. Experiment with different sizes and designs to find the perfect fit for each page. Whether you opt for traditional origami patterns or create your own, these folded creations can be a true reflection of your creativity.
A Craft Within a Craft: Incorporating origami into your scrapbooking isn’t just about embellishments; it’s a craft within a craft. It invites you to step into the meditative and artistic world of paper folding. The process of creating origami pieces can be therapeutic and rewarding, adding an extra layer of enjoyment to your scrapbooking journey.
Storytelling Through Shapes: Each origami shape you include can tell its own story. Whether it’s a crane symbolizing hope, a star representing dreams or a heart conveying love, these folded elements become narrative tools that enhance the emotional impact of your pages.
Incorporating origami into your scrapbooking is a delightful way to infuse your personal touch, symbolism and artistic flair into each page. These intricate folded creations add an element of surprise and depth, making your scrapbook an exquisite work of art that not only captures memories but also invites viewers to explore and experience your stories on a whole new level.
Additionally, you can find further information on this topic by visiting this page: Scrapbooking Papers: Colourful Rock Scrapbook: 40 Decorative …
Layered Paper Frames
Craft intricate frames from layered paper and cardstock to highlight your cherished photos.
Elevating your scrapbook pages to an artful level involves not only selecting the right photos but also creating visually captivating presentations. One way to achieve this is by crafting intricate frames from layered paper and cardstock. These frames not only serve a functional purpose but also add depth and dimension to your layouts, making your cherished photos truly stand out.
1. Layered Dimension: Crafting frames from multiple layers of paper and cardstock adds a three-dimensional quality to your scrapbook pages. By stacking contrasting or coordinating colors and patterns, you create a visual frame that draws the viewer’s eye to the photo within.
2. Personalized Touch: Handcrafting frames allows for complete personalization. You can tailor the colors, patterns and shapes to match the theme or mood of your page. This level of customization ensures that your frames complement your photos and tell a cohesive story.
3. Framing as Design Element: Frames not only encase your photos but also act as design elements. They can be used to create focal points, guide the viewer’s attention or establish a visual hierarchy on your page. The layers and textures of your frames can add intrigue and visual interest.
4. Texture and Embellishment: Incorporating textured papers, such as corrugated cardstock or handmade paper, adds tactile appeal to your frames. Further embellishments like brads, buttons or ribbon can enhance the frame’s aesthetics and tie it into the overall theme of your layout.
5. Thematic Variety: The versatility of crafting frames means you can adapt them to various themes and styles. Whether you’re creating a vintage-inspired page with distressed frames or a modern layout with clean lines, your handcrafted frames can reflect your chosen aesthetic.
6. Showcasing Special Moments: Use these frames to showcase your most treasured photos—those that hold a special place in your heart. The effort and artistry you put into crafting the frame underscore the importance of the moment captured within.
7. Craftsmanship and Satisfaction: Crafting frames is not only creatively rewarding but also a form of craftsmanship. The meticulous process of cutting, layering and embellishing adds an extra layer of satisfaction to your scrapbooking experience.
8. Frame Variations: Experiment with different frame shapes, such as rectangles, squares, circles or custom shapes, to achieve varied effects. Consider layering frames to create intricate borders or using negative space to frame your photos uniquely.
Incorporating intricately crafted frames into your scrapbooking projects elevates them from simple documentation to works of art. These frames not only enhance the visual appeal of your pages but also allow you to infuse your personal style and creativity into your storytelling. So, the next time you embark on a scrapbooking project, consider how the artistry of layered paper and cardstock frames can beautifully frame your cherished memories and make them truly unforgettable.
For additional details, consider exploring the related content available here 11 Scrapbook Titles: Quick and Inspiring Layered Paper Projects
Tips for DIY Embellishments
Creating your own embellishments is a delightful process, but here are some tips to ensure success:
Certainly! Here’s an extended idea:
“Creating your own embellishments is not only a delightful process but also a rewarding one that adds a personal touch to your scrapbooking projects. It’s a chance to infuse your layouts with unique elements that reflect your creativity and style. To embark on this creative journey with confidence, here are some valuable tips to ensure your success:
Gather Your Supplies: Before diving into the world of DIY embellishments, gather all the necessary supplies. Depending on your chosen embellishment, this may include paper, adhesive, cutting tools, stamps, inks, markers and any other materials specific to your project. Having everything within reach will streamline your creative process.
Plan and Sketch: Start with a clear vision of the embellishments you want to create. Sketch out your ideas on paper to visualize the design and arrangement. Planning helps you refine your concept and avoid costly mistakes. It’s also an opportunity to explore different variations of your embellishments.
Experiment with Techniques: DIY embellishments allow you to experiment with various techniques. Explore paper folding, stamping, embossing, watercolor painting and other craft techniques to achieve the desired effects. Don’t be afraid to try new methods; you might discover a signature style that sets your creations apart.
Choose Quality Materials: The quality of your materials can significantly impact the final result. Opt for acid-free and archival-quality paper and inks to ensure your embellishments won’t deteriorate over time. Using high-quality materials also enhances the overall appearance of your scrapbook pages.
Embrace Texture and Dimension: To make your DIY embellishments stand out, add texture and dimension to your designs. Consider layering elements, using foam adhesive for a 3D effect or incorporating tactile materials like ribbons, fabric or buttons. Texture and dimension can elevate the visual appeal of your creations.
Balance Your Layout: When incorporating DIY embellishments into your layouts, strive for balance. Ensure that the embellishments complement rather than overwhelm your photos and journaling. Experiment with different placements and arrangements until you achieve harmony within your design.
Personalize with Meaning: DIY embellishments offer a unique opportunity to infuse your layouts with personal meaning. Incorporate symbols, quotes or motifs that hold significance to the story you’re telling. These personalized touches add depth and emotional resonance to your scrapbook pages.
Practice Patience: Crafting DIY embellishments can be intricate and time-consuming. Exercise patience and take your time to perfect each element. Precision and attention to detail are key to creating embellishments that truly shine.
Document Your Process: Don’t forget to document your DIY embellishment process. Take photos or make notes of the techniques and materials you used. This documentation can serve as a reference for future projects and help you recreate successful embellishments.
Enjoy the Journey: Finally, remember that the process of creating DIY embellishments is an art form in itself. Embrace the joy of crafting, relish the sense of accomplishment with each finished piece and let your creativity flow freely. Your passion and enthusiasm will infuse your creations with authenticity and charm.
Incorporating DIY embellishments into your scrapbooking repertoire is a delightful way to infuse your layouts with personal creativity. By following these tips and allowing your imagination to flourish, you’ll not only enjoy the process but also enhance the visual and emotional impact of your scrapbooking projects.”
If you’d like to dive deeper into this subject, there’s more to discover on this page: Scrapbooking Supplies: Tools and Embellishments We are …

Experiment and Have Fun
There are no strict rules in DIY embellishment crafting. Let your creativity flow and be open to experimenting with different materials and techniques.
In the world of DIY embellishment crafting, the canvas is yours to paint and there are no rigid rules to confine your creativity. It’s a liberating and rewarding hobby where you can truly let your imagination run wild. Here are a few thoughts on why embracing the freedom to experiment with various materials and techniques can lead to some of your most extraordinary creations:
Unleash Your Inner Artist: DIY embellishment crafting is like being an artist with an entire studio at your disposal. You’re not just creating functional pieces; you’re crafting miniature works of art. By allowing your creativity to flow freely, you can experiment with colors, shapes and textures to produce embellishments that are uniquely yours.
Expand Your Craftsmanship: Trying new materials and techniques is a fantastic way to expand your crafting skills. You might discover a newfound love for paper quilling, fabric manipulation or resin casting. Each experimentation broadens your toolkit and equips you with new techniques to incorporate into your projects.
Craft with Purpose: Embracing experimentation can also help you craft with intention. You may find that specific materials or techniques evoke certain emotions or themes. For example, experimenting with distressed inking techniques could lend a vintage, aged feel to your embellishments, perfect for a heritage-themed scrapbook.
Celebrate Unique Moments: Sometimes, the most memorable and cherished embellishments are the result of spontaneous creativity. By being open to experimentation, you can commemorate special moments or create one-of-a-kind gifts that hold deep sentimental value. These unique embellishments become conversation starters and cherished keepsakes.
Find Your Signature Style: While there are no strict rules, embracing experimentation can help you discover your signature style. As you experiment with various elements, you’ll naturally gravitate toward certain materials, colors or techniques that resonate with you. This journey of self-discovery adds a personal touch to your creations that others will recognize and appreciate.
Embrace the Joy of Learning: DIY embellishment crafting is a continual learning process. Every experiment, whether successful or not, is an opportunity to learn and grow. Mistakes can be valuable teachers, leading to unexpected discoveries and innovative solutions.
Create Unconventional Beauty: Some of the most striking and unique embellishments arise from unconventional combinations. Mixing unexpected materials like metal and lace or experimenting with contrasting colors and textures, can result in embellishments that defy traditional norms and captivate the eye.
In the world of DIY embellishment crafting, there are no limits to what you can create. The process itself is a form of self-expression and each embellishment tells a story, evokes an emotion or adds a touch of personality to your projects. So, embrace the freedom to experiment, relish the joy of creativity and let your DIY embellishments be a reflection of your artistic journey. There’s no telling what extraordinary creations lie ahead when you open yourself up to the world of limitless possibilities in crafting.
Explore this link for a more extensive examination of the topic: foam stickers – American Crafts

Keep It Cohesive
While you can mix and match various DIY embellishments, try to maintain a cohesive theme or color palette on each page for visual harmony.
“While you can mix and match various DIY embellishments, try to maintain a cohesive theme or color palette on each page for visual harmony. This ensures that your creations have a unified and pleasing aesthetic, making them more engaging and appealing to the viewer. Consistency in theme and color also helps convey a clear message or evoke a specific mood throughout your project, enhancing its overall impact and making it a more cohesive and enjoyable experience for your audience.”
For a comprehensive look at this subject, we invite you to read more on this dedicated page: Birthday Scrapbook Ideas: Fun and Simple Ways to Capture Memories

Precision Matters
Attention to detail can make a significant difference. Use precision tools like fine-tip scissors and high-quality adhesives for clean and secure crafting.
When it comes to crafting, attention to detail is not just a minor consideration; it’s often the key to elevating your projects from good to exceptional. The use of precision tools and high-quality adhesives is a testament to the commitment to excellence in your craft.
Fine-tip scissors, for instance, are more than just cutting instruments; they are the brushstrokes of your creative vision. With their precision and control, you can achieve intricate cuts and delicate shapes that add nuance and depth to your work. Whether you’re creating paper art, scrapbooking or intricate paper cutting, fine-tip scissors are your trusted companions, ensuring that every curve and edge is precisely as you envisioned.
High-quality adhesives are the unsung heroes of crafting. They are the invisible bonds that hold your creations together and their quality can mean the difference between a project that stands the test of time and one that falls apart. The right adhesive ensures that your work remains secure, even in the face of time and wear. It’s a small investment that guarantees the longevity and durability of your craft.
But the benefits of precision tools and high-quality adhesives go beyond the technical aspects of crafting. They also empower you as a creator. These tools give you the confidence to push the boundaries of your creativity. With the right scissors and adhesives in hand, you can experiment with intricate designs, layering techniques and mixed-media projects, knowing that your tools will meet your expectations.
Attention to detail not only impacts the visual appeal of your creations but also your crafting experience. Crafting becomes a mindful and immersive activity when you can rely on the precision and quality of your tools. It allows you to focus on the joy of creating, knowing that the technical aspects are well taken care of.
In essence, precision tools and high-quality adhesives are not just accessories; they are your partners in crafting excellence. They enable you to realize your artistic vision with clarity and confidence. So, whether you’re a seasoned crafter or just starting your creative journey, don’t underestimate the significance of attention to detail and the role these tools play in elevating your craft to new heights.
Looking for more insights? You’ll find them right here in our extended coverage: Amazon.com: Paper Wishes – Dazzles Stickers Collection | Unique …

Document Your Process
Consider taking photos of your DIY embellishment creation process. These behind-the-scenes shots can become part of your scrapbook and add depth to your storytelling.
Photographing the DIY embellishment creation process is like capturing the magic behind the scenes of a movie. It’s a glimpse into the creative journey that often goes unnoticed but plays a significant role in the final masterpiece. These candid shots offer a unique perspective on your crafting process and when incorporated into your scrapbook, they add a layer of authenticity and depth to your storytelling.
Imagine flipping through your scrapbook years from now and coming across these behind-the-scenes photographs. They serve as a visual diary of your creative endeavors, a reminder of the dedication and passion that went into crafting each page. These images capture the essence of your artistic journey, from the initial spark of inspiration to the meticulous work of assembling and refining your embellishments.
Moreover, these photos tell a story within a story. They reveal the thought and effort put into every detail, showcasing the craftsmanship that elevates your scrapbook from a simple collection of pictures to a work of art. You can use captions or annotations to describe the techniques, materials and emotions involved in each step of the embellishment-making process.
Including behind-the-scenes shots in your scrapbook also allows you to share your creative process with others. Whether you’re creating the scrapbook for yourself, your family or as a gift, these images provide a window into your artistic world. They offer insights into your artistic choices, from color palettes and textures to the tools you use. It’s a way of inviting others to appreciate the artistry and effort that goes into each page.
Furthermore, these photographs serve as a source of inspiration for future projects. They document your growth as a crafter, allowing you to see how your techniques and style have evolved over time. They may even spark ideas for new embellishments or layouts in your future scrapbooking endeavors.
Incorporating behind-the-scenes shots into your scrapbook is not only a way of adding depth to your storytelling but also a celebration of the creative process itself. It’s a tribute to the journey of transforming ordinary materials into extraordinary embellishments that breathe life into your memories. So, the next time you embark on a DIY embellishment project, don’t forget to capture those magical behind-the-scenes moments—they’re an integral part of your scrapbooking story.
Should you desire more in-depth information, it’s available for your perusal on this page: How To Create a Beautiful Scrapbook – Step By Step Guide – Boost …
Share the Love
If you create more DIY embellishments than you can use, consider gifting them to fellow scrapbookers or using them in other craft projects.
If you create more DIY embellishments than you can use, consider gifting them to fellow scrapbookers or using them in other craft projects.
Sharing your handcrafted embellishments with fellow scrapbookers can be a wonderful way to foster a sense of community and creativity within your crafting circle. You can organize craft swaps or simply surprise your friends with your unique creations. Not only will you be spreading joy and inspiration, but you’ll also be able to see your embellishments put to use in a variety of different ways, adding an extra layer of satisfaction to your crafting journey.
Moreover, DIY embellishments have the potential to transcend scrapbooking and find new life in other creative endeavors. They can be repurposed into greeting cards, mixed media artwork, home decor or even jewelry. The versatility of these embellishments means they can complement a wide range of craft projects, allowing you to explore different artistic expressions and expand your crafting horizons.
If you have children or family members who enjoy crafting, involving them in the process of using your surplus DIY embellishments can be a fantastic bonding experience. Together, you can create unique handmade cards for special occasions, decorate photo frames or embark on other crafty adventures. It’s an opportunity to pass down your crafting skills and creativity to the next generation.
Another idea is to consider donating your excess DIY embellishments to local schools, community centers or organizations that engage in art therapy programs. Your handcrafted pieces can bring joy and creative outlets to individuals who may not have easy access to crafting supplies.
Additionally, if you find yourself accumulating a surplus of DIY embellishments, it may be worth considering turning your crafting skills into a small business venture. You can sell your handmade embellishments online or at local craft fairs, sharing your creative talents with a broader audience and potentially generating a source of income from your passion.
In the world of crafting, the possibilities are endless and the journey is just as rewarding as the finished project. So, whether you choose to gift, repurpose, share or sell your surplus DIY embellishments, you’re contributing to a vibrant and thriving crafting community while continuing to explore the boundless realm of creativity.
Should you desire more in-depth information, it’s available for your perusal on this page: Free Online Scrapbook Maker – Create Digital Scrapbooks | Canva

A Unique Legacy
DIY embellishments not only make your scrapbook pages visually stunning but also infuse them with your personal touch and creative spirit. With each handmade embellishment, you’re leaving a unique legacy for yourself and future generations to cherish. So, grab your crafting supplies, let your imagination run wild and start adding those one-of-a-kind touches to your scrapbook pages. Your creativity knows no bounds and your memories will shine brighter than ever.
DIY embellishments not only make your scrapbook pages visually stunning but also infuse them with your personal touch and creative spirit. With each handmade embellishment, you’re leaving a unique legacy for yourself and future generations to cherish. So, grab your crafting supplies, let your imagination run wild and start adding those one-of-a-kind touches to your scrapbook pages. Your creativity knows no bounds and your memories will shine brighter than ever.
One of the most beautiful aspects of DIY embellishments is that they evolve with you. As you hone your crafting skills and explore new techniques, your embellishments become more intricate and expressive. They become a reflection of your growth as an artist and a storyteller. When you look back at your earlier scrapbooks, you’ll see how your style and craftsmanship have evolved, creating a visual timeline of your creative journey.
Moreover, DIY embellishments provide an opportunity to repurpose and recycle materials, giving new life to old items. You can transform vintage buttons, fabric scraps or even bits of nature like leaves and twigs into charming embellishments. This eco-friendly approach not only adds character to your scrapbook but also contributes to sustainable crafting practices, aligning your creative endeavors with a more environmentally conscious lifestyle.
As you delve into the world of DIY embellishments, you’ll discover that the possibilities are endless. Whether you’re creating delicate paper flowers, hand-stamped tags or tiny mixed-media masterpieces, each embellishment tells a story within your scrapbook. They become more than just decorations; they become symbols, conveying emotions, sentiments and memories that words alone cannot capture.
Furthermore, as you share your scrapbooks with friends and family, your DIY embellishments become conversation starters and memory triggers. Loved ones will marvel at your creativity and be drawn into the stories behind each embellishment, fostering a deeper connection with the memories you’ve captured.
In the end, DIY embellishments are not just a creative choice; they are a reflection of your personality and a testament to the importance of preserving your memories in a meaningful and artistic way. So, let your creativity flourish, experiment with new techniques and watch as your scrapbook pages come to life with embellishments that are as unique as the memories they represent. Your creative spirit knows no bounds and the legacy you’re creating will be cherished for generations to come.
Additionally, you can find further information on this topic by visiting this page: The joy of scrapbooking: preserving memories with style …
More links
To delve further into this matter, we encourage you to check out the additional resources provided here: Scrapbooking Supplies: Tools and Embellishments We are …