
Table of Contents
- The Basics of Scrapbooking
- Layering: The Art of Composition
- Choosing Papers and Backgrounds
- Adding Photos as the Focal Point
- Layering with Embellishments
- Journaling for Context
- Dimension: Bringing Pages to Life
- Foam Tape and Pop Dots
- Die-Cut Shapes
- Layered Frames
- Less can be more
- Visual hierarchy
- Color coordination
- Experiment
- Preserving Memories with Artistry
Scrapbooking is an art form that allows us to preserve our cherished memories and express our creativity. At its core, it’s about storytelling through visuals. One of the key techniques that elevate scrapbooking to an art form is the use of layering and dimension. In this article, we’ll delve into the world of scrapbooking and explore how layering and dimension can breathe life into your scrapbook pages, adding visual interest and depth to your creations.
Scrapbooking is an art form that allows us to preserve our cherished memories and express our creativity. At its core, it’s about storytelling through visuals. One of the key techniques that elevate scrapbooking to an art form is the use of layering and dimension. In this article, we’ll delve into the world of scrapbooking and explore how layering and dimension can breathe life into your scrapbook pages, adding visual interest and depth to your creations.
Layering: Crafting Visual Narratives
Layering is more than just placing one item on top of another; it’s a way to craft visual narratives within your scrapbook. When you layer, you’re essentially building a visual story that unfolds as the viewer engages with your page. Start by selecting the key elements of your layout, such as photos, embellishments and background papers. Arrange them in a way that guides the eye and tells your story cohesively.
Imagine you’re creating a page to commemorate a family vacation. You might start with a background that resembles the beach, then layer on a sandy texture, followed by photos of your family building sandcastles. Add a layer of seashells, a small bucket and shovel and some handwritten notes to complete the scene. Each layer adds depth and context, drawing the viewer into the memory and allowing them to experience it in a more immersive way.
Dimension: Bringing Your Scrapbook to Life
Dimension in scrapbooking is like the icing on the cake. It takes your layout from flat to fabulous, making your memories feel tangible. Achieving dimension can be done through a variety of techniques:
3D Embellishments: Utilize stickers, chipboard pieces and die-cuts that have foam adhesive on the back. These lift elements off the page, creating a delightful pop-up effect.
Layered Paper: Experiment with different paper weights and textures. You can curl, crumple or fold paper to add texture and depth.
Paper Cutting: Try your hand at paper cutting techniques like paper piecing or fussy cutting to create intricate, layered designs. This can be especially effective for creating themed borders or frames.
Texture Paste: Incorporate texture paste to add raised patterns and textures. You can use stencils to create custom designs, such as floral patterns or brick walls.
Folded Elements: Create interactive elements like mini flip books, accordion-style folded sections or even pockets to hold hidden treasures like additional photos or journaling cards.
By introducing these techniques, you not only enhance the visual appeal of your scrapbook but also engage the sense of touch, making your memories feel more vivid and real.
The Art of Balance: Tips for Effective Layering and Dimension
While layering and dimension can bring immense visual interest to your scrapbook, it’s important to strike a balance. Here are some tips to keep in mind:
Hierarchy: Establish a visual hierarchy, with your main focal point as the centerpiece and additional layers supporting it.
Color Palette: Maintain a cohesive color palette to ensure that the layers complement each other and don’t overwhelm the viewer.
White Space: Don’t overcrowd your page. Leave some white space to give the eyes room to breathe and focus on the most important elements.
Trial and Error: Experiment with different arrangements before committing to your final layout. Sometimes, shifting elements slightly can make a big difference.
In conclusion, scrapbooking is not merely a craft but an art form that allows you to weave stories and memories together in a visually captivating way. Embracing layering and dimension as integral parts of your scrapbooking toolkit can unlock new dimensions of creativity and transform your pages into immersive memory experiences. So, gather your photos, mementos and crafting supplies and start creating scrapbook pages that not only tell your story but also bring it to life with depth and dimension.
To expand your knowledge on this subject, make sure to read on at this location: Hip Kit Club Embellishment Kits: Enhance Your Scrapbooking Projects
The Basics of Scrapbooking
Before we dive into layering and dimension, let’s briefly revisit the fundamentals of scrapbooking. At its essence, scrapbooking involves arranging photographs, memorabilia and decorative elements on a page to narrate a story or capture a moment. These pages are often organized into albums, making them a tangible keepsake for future generations.
Before we delve into the intricate world of layering and dimension in scrapbooking, it’s essential to reaffirm the foundational principles of this cherished craft. At its very core, scrapbooking is an art form that revolves around the thoughtful arrangement of photographs, cherished memorabilia and carefully chosen decorative elements on a blank canvas, creating a visually compelling narrative that captures the essence of a moment or a story. These artfully crafted pages, each a labor of love, are often assembled into albums, transforming them into tangible treasures that transcend time. They serve as windows into the past, preserving memories, emotions and personal histories for the enjoyment and reflection of future generations. In this age of digital abundance, the tactile and heartfelt nature of scrapbooking remains a timeless tradition, a testament to the enduring power of storytelling through creativity.
To delve further into this matter, we encourage you to check out the additional resources provided here: Scrapbooking Layouts and Projects – Page 2 – Crafty Concepts with …
Layering: The Art of Composition
Layering in scrapbooking refers to the practice of stacking various elements on top of each other to create depth and complexity. It’s akin to building a visual sandwich with your photos, papers, embellishments and journaling. The key to effective layering lies in balancing the elements to ensure the page remains visually harmonious.
Certainly, let’s delve further into the art of layering in scrapbooking and the nuances that make it a creative and visually compelling technique:
The Art of Layering: Crafting Visual Narratives
Layering in scrapbooking is akin to composing a symphony of memories and visuals. It’s the art of arranging various elements on your page to build depth, complexity and a captivating visual story. Much like a painter uses layers of paint to create depth in a canvas, scrapbookers use layers of photos, papers, embellishments and journaling to craft their own visual narratives.
Creating a Visual Hierarchy
One of the fundamental principles of effective layering is establishing a visual hierarchy. This means that within the layers, certain elements should take center stage while others provide supporting roles. Your focal photo or key image often serves as the anchor, around which you arrange the supporting cast of papers and embellishments. By doing so, you guide the viewer’s eye and ensure that the main story or theme remains the focus.
Balancing Act: Harmony in Layers
Balance is the linchpin of successful layering. It’s the careful orchestration of elements to ensure your scrapbook page is visually harmonious. Too much layering can lead to clutter and distraction, while too little can result in a flat and uninteresting layout. Achieving this balance requires a keen eye and a willingness to experiment.
Layering with Papers and Backgrounds
Start your layering journey with the choice of background papers or cardstock. This sets the tone for your layout and provides the first layer. Consider contrasting colors or patterns to make your photos and other elements pop. Layering additional papers, perhaps torn or distressed, adds depth and texture to the foundation.
Embellishments: Building Texture and Interest
Embellishments are the stars of the layering show. These can include stickers, chipboard pieces, buttons, ribbons and more. As you place them on your page, think about their textures, shapes and sizes. Some embellishments can be tucked behind photos or papers to create subtle surprises, while others can take center stage as eye-catching accents.
Journaling as a Layer of Storytelling
Don’t forget the power of words in your layers. Journaling adds another dimension to your scrapbook, allowing you to tell the story behind the photos. Consider layering journaling strips, cards or even handwritten notes among the visual elements. This textual layer not only provides context but also adds a personal touch to your creation.
Mixing Media and Techniques
Layering isn’t confined to flat elements. Scrapbookers often incorporate mixed media techniques such as stamping, stenciling and painting to create unique layers of texture and interest. These techniques can add depth and a tactile quality to your pages.
Sharing Emotions Through Layering
Beyond the aesthetics, layering in scrapbooking enables you to convey emotions and memories. The careful arrangement of elements can evoke nostalgia, joy or even a sense of adventure. It’s a creative outlet for capturing the essence of moments and preserving them for future generations.
The Ever-Evolving Art of Layering
In the world of scrapbooking, layering is both a timeless tradition and an ever-evolving art form. Scrapbookers continue to innovate, incorporating new materials, techniques and design concepts. Each page becomes a canvas for personal expression and layering remains at its core—a creative, visual journey through time and memory.
In summary, layering in scrapbooking is a multidimensional approach to storytelling and self-expression. It’s a dynamic interplay of colors, textures and memories that transforms a blank page into a tapestry of experiences. Through the artful arrangement of layers, scrapbookers breathe life into their albums, creating a tangible and cherished legacy of the moments that matter most. So, the next time you embark on a scrapbooking adventure, remember that layering is not just about composition; it’s about crafting a visual narrative that captures the heart and soul of your memories.
For additional details, consider exploring the related content available here 6 Achievable Layering Paper Tips for Eye-Catching Scrapbook …

Choosing Papers and Backgrounds
Begin your scrapbooking journey by selecting the background paper or cardstock for your page. This serves as the canvas for your composition. Choose a paper that complements the theme of your layout. For example, a beach vacation page might benefit from a soft, sandy-toned background, while a birthday celebration could pop against a bright, festive backdrop.
Embarking on your scrapbooking adventure is an exciting journey and selecting the right background paper or cardstock sets the stage for your creative masterpiece. This initial step not only provides a canvas for your composition but also establishes the mood and theme of your scrapbook page. Here are some valuable insights to guide you through this essential decision:
1. Theme and Purpose: Consider the theme and purpose of your scrapbook page. Are you documenting a joyful family reunion, a serene nature retreat or a momentous graduation? Understanding the essence of your page will help you select a background that complements and enhances your storytelling.
2. Color Psychology: Delve into the psychology of colors to evoke the desired emotions and sentiments. Soft, earthy tones can evoke feelings of calm and relaxation, perfect for nature-inspired layouts. Vibrant, primary colors may infuse energy and excitement into pages celebrating birthdays and milestones. Be mindful of color symbolism to ensure your choice aligns with the message you want to convey.
3. Contrast and Balance: Consider the contrast and balance between your background paper and the elements you plan to add, such as photos, embellishments and journaling. A high-contrast background can make colorful photos and decorations pop, while a more subdued background can create an elegant and cohesive look.
4. Texture and Pattern: Explore the world of texture and pattern in scrapbooking. Some background papers feature subtle textures or patterns that can add depth and visual interest to your page. Textured cardstock can mimic the feel of certain environments, like sandpaper for a beach-themed layout or a raised brick pattern for an urban backdrop.
5. Photo Considerations: Keep in mind the colors and tones in your photos. A background that complements the dominant colors in your images can create a harmonious and visually appealing layout. Black-and-white photos may pair well with a range of background colors, allowing you to experiment with various themes.
6. Storytelling Flow: Envision how your background paper will contribute to the flow of your storytelling. It should enhance the narrative and draw attention to the central elements of your page, such as photos and journaling. The background sets the stage but should never overpower the story you’re telling.
7. Personal Style: Lastly, embrace your personal style and creative intuition. Let your instincts guide you toward a background that resonates with your vision for the page. Trust your artistic sensibilities to make choices that feel authentic to you.
Choosing the perfect background paper or cardstock is just the beginning of your scrapbooking adventure. It’s the foundation upon which you’ll build a visual story that captures the essence of your cherished moments. By considering themes, colors, textures and personal style, you’ll craft a background that not only complements your photos but also transforms your scrapbook page into a work of art that tells your unique story.
Explore this link for a more extensive examination of the topic: 6 Achievable Layering Paper Tips for Eye-Catching Scrapbook …
Adding Photos as the Focal Point
Your photographs are the heart of your scrapbook page. Start by selecting one or more focal photos that convey the main theme or story you wish to tell. These photos should be the central point of focus, around which you’ll build your layers.
Your photographs are the heart and soul of your scrapbook page. They hold the power to evoke memories, emotions and stories that you want to cherish and share. When you embark on the creative journey of scrapbooking, the first step is to carefully select one or more focal photos that will convey the main theme or narrative you wish to tell. These photos should be chosen thoughtfully, as they will be the central point of focus around which you’ll build the layers of your page.
Consider these key aspects when selecting your focal photos:
Storytelling: Your chosen photos should narrate a specific moment or memory that you want to capture. Think about the story you want to tell and how these images can help convey it. Whether it’s a family gathering, a special occasion, a milestone or a cherished moment, your photos should reflect the essence of that narrative.
Emotion: Photos have the incredible ability to convey emotions and sentiments. Look for images that evoke feelings, whether it’s joy, nostalgia, love or any other emotion tied to the memory. The emotional resonance of your focal photos will connect with viewers on a deeper level.
Composition: Pay attention to the composition and visual appeal of your photos. Look for well-composed shots that are clear, focused and visually engaging. Consider factors like lighting, angles and framing when making your selection.
Variety: Depending on the story you’re telling, you might choose a single standout photo as your focal point or opt for a collage of images that together convey the narrative. The variety of photos you select can add depth and dimension to your scrapbook page.
Once you’ve chosen your focal photos, they become the guiding stars of your creative process. Arrange your layout, embellishments and journaling around these photos, ensuring that they remain the central focus. By doing so, you’ll create a cohesive and visually compelling scrapbook page that not only captures your memories but also conveys the emotions and stories that make them truly special. Your photos will serve as a window into your world, inviting others to share in the moments that matter most to you.
For a comprehensive look at this subject, we invite you to read more on this dedicated page: 5 Ways to Create a Focal Point Using Frames – Anna Aspnes Designs

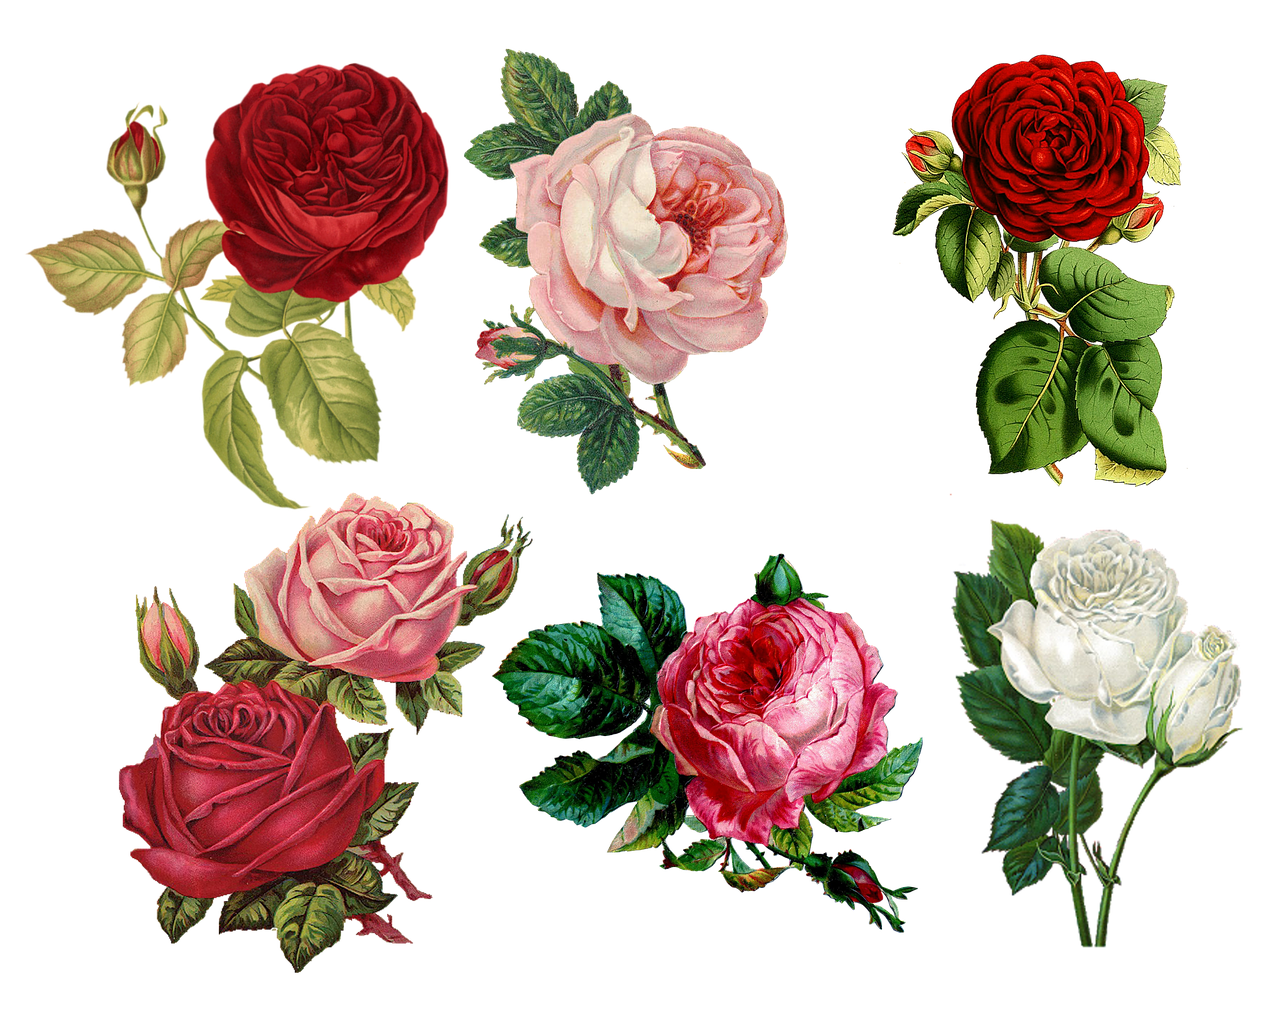
Layering with Embellishments
Embellishments are where layering truly shines. These can include stickers, die-cuts, ribbons, buttons and more. Experiment with layering these elements around your photos. Place some items beneath the photos to create depth and others on top for added interest. This combination of foreground and background layers adds dimension to your page.
Embellishments are the creative soul of scrapbooking and when it comes to layering, they take center stage in adding depth, personality and storytelling to your pages. They’re the small but significant details that turn a collection of photos into a captivating visual narrative.
Incorporating embellishments like stickers, die-cuts, ribbons, buttons and various ephemera is where your artistic flair can truly shine. These little treasures not only add visual interest but also evoke emotions and memories, making your scrapbook come to life.
Experimentation is key when layering these elements around your photos. Consider placing some beneath the photos to create an illusion of depth, much like framing a cherished memory. These background layers serve as a foundation, adding context and setting the scene for your photos. They can also be used to mimic the look of a photo album or a scrapbook within a scrapbook, giving your page a charming, handmade touch.
On the flip side, don’t hesitate to adorn your photos with embellishments. Placing items on top of your pictures adds intrigue and guides the viewer’s eye to specific details or moments you want to highlight. It’s like telling a visual story within a story, drawing attention to the smiles, the laughter or the intricate details captured in your photos.
This combination of foreground and background layers is what infuses your scrapbooking with dimension. It’s what makes your page more than just a collection of images; it’s a multisensory experience that invites viewers to touch, feel and engage with the memories you’ve preserved.
Furthermore, embellishments are a fantastic way to tie the thematic elements of your scrapbook together. Whether you’re creating a travel scrapbook, a baby album or a tribute to a special event, carefully chosen embellishments can reinforce the theme, evoke emotions and create a cohesive visual narrative.
In the world of scrapbooking, layering embellishments is like composing a symphony of memories. Each piece plays a unique role, contributing to the harmonious whole. So, let your creativity flow as you experiment with layering stickers, ribbons, buttons and more. These embellishments are not just decorations; they are the storytellers that make your scrapbook pages sing with life and meaning.
To delve further into this matter, we encourage you to check out the additional resources provided here: Scrapbooking for Mortals Tutorial #1 – Layering
Journaling for Context
Layering isn’t limited to physical elements; it can also apply to journaling. Write down your thoughts, memories and captions on smaller pieces of paper or journaling cards. These can be layered alongside your photos or nestled within the design, adding a storytelling dimension to your layout.
Layering in scrapbooking is an art form that extends beyond the physical arrangement of embellishments and photos; it’s a technique that can be beautifully applied to journaling as well. By incorporating layered journaling into your layouts, you’re adding depth and richness to the storytelling aspect of your scrapbook.
One of the creative ways to do this is by using smaller pieces of paper or journaling cards to write down your thoughts, memories and captions. These miniature canvases not only provide a visually appealing contrast to your larger photos but also serve as dedicated spaces for your personal narratives. They become like windows into your experiences, allowing you to dive deeper into the stories behind the images.
Imagine a scrapbook layout that captures the joy of a family picnic. Alongside the vibrant photos of smiling faces and delicious food, you can layer journaling cards with handwritten anecdotes about the day’s adventures. These snippets of text become a bridge between the visual elements, adding context and emotions that help viewers connect with the memories you’re preserving.
Layered journaling also allows for creative freedom in design. You can experiment with different fonts, colors and writing styles to complement the overall theme of your scrapbook. Handwritten notes can evoke a sense of nostalgia, while typed captions may convey a more contemporary feel. The choice is yours and it adds an extra layer of personalization to your project.
Furthermore, by nestling these journaling elements within your layout, you’re not just telling a story; you’re inviting viewers to actively engage with your scrapbook. They’ll be drawn into the narrative, prompted to explore each layer and discover the hidden gems of your memories. It creates an interactive experience that transforms your scrapbook from a mere collection of photos into a meaningful journey through time.
In essence, layering journaling in your scrapbooking is akin to weaving a tapestry of words and images, creating a multi-dimensional story that resonates with both the heart and the eye. It’s a testament to the artistry of scrapbooking, where every layer contributes to a richer, more profound narrative, making your memories truly come to life on each page. So, embrace the technique, experiment with different layouts and watch as your scrapbook becomes a captivating storybook of your life’s adventures.
Additionally, you can find further information on this topic by visiting this page: Create a Digital Journal Collage – Anna Aspnes Designs

Dimension: Bringing Pages to Life
To truly infuse life into your scrapbook, consider dimension. Dimension in scrapbooking refers to creating visual interest by adding elements that “pop” off the page. This can be achieved in various ways:
To truly bring your scrapbook to life and captivate the viewer’s imagination, consider the power of dimension. Dimension in scrapbooking is like the secret ingredient that elevates a flat page into a multi-dimensional work of art. It adds depth, texture and visual interest, making your memories come alive in a way that simple photographs and flat embellishments cannot. Let’s explore some creative ways to incorporate dimension into your scrapbooking:
Layering: One of the most effective ways to introduce dimension is through layering. By placing elements on top of one another, you create a sense of depth. This could involve stacking photos, patterned paper or embellishments. For instance, you might layer a smaller photo on top of a larger one, with a decorative mat in between or overlap stickers and die-cuts for added depth.
3D Embellishments: Explore the world of 3D embellishments such as stickers, chipboard elements and epoxy dots. These elements literally “pop” off the page, instantly drawing attention. Whether it’s adding a raised butterfly, a textured flower or even small foam adhesive dots behind your embellishments, these create engaging focal points and tactile experiences.
Die-Cut and Paper Piecing: Die-cutting machines and paper piecing techniques allow you to create intricate and multi-layered designs. You can cut shapes, titles or intricate patterns from different papers, layering them to create eye-catching designs. This adds both dimension and visual interest.
Texture and Mixed Media: Incorporating textures like ribbon, lace, fabric or twine can introduce tactile dimension. You can also experiment with mixed media techniques, adding texture through techniques like stenciling, embossing or using texture paste.
Shadowing and Inking: A simple but effective way to create dimension is by adding shadows and ink. Use shading techniques around the edges of your photos or embellishments to make them appear lifted off the page. Ink the edges of papers to create a distressed look and enhance the visual depth.
Interactive Elements: For an extra element of surprise and engagement, consider adding interactive elements like flip-up flaps, pockets or hidden journaling spots. These not only add dimension but also invite viewers to explore your scrapbook more actively.
Foam Tape and Pop Dots: Foam adhesive tape and pop dots are handy tools for elevating elements. They can be used to raise photos, sentiments or embellishments, creating a 3D effect. Different thicknesses of foam tape can also be used to vary the level of dimension.
Shadow Boxes: If you’re looking for a truly immersive and dimensional experience, consider creating shadow boxes within your scrapbook. These miniature 3D displays can house memorabilia, small trinkets or even mini dioramas, adding an extra layer of storytelling.
Incorporating dimension into your scrapbooking not only makes your pages visually striking but also adds a tactile and sensory element to your memories. It transforms your scrapbook from a flat collection of images into a dynamic and immersive storytelling medium. So, don’t hesitate to experiment with these techniques and let your creativity run wild to bring your scrapbook to life in three dimensions.
Should you desire more in-depth information, it’s available for your perusal on this page: Beautiful Card Ideas for Using Printed Paper Packs – Altenew

Foam Tape and Pop Dots
These adhesive materials raise elements like photos and embellishments off the page, creating shadows and depth.
The use of adhesive materials in creative projects, such as scrapbooking and mixed-media art, adds a dimension of artistry that goes beyond mere placement. These materials serve as more than just glues; they are essential tools for artists and crafters to elevate their work to new levels of creativity and sophistication.
One of the key advantages of adhesive materials is their ability to introduce shadows and depth to a composition. When you affix elements like photographs, embellishments or textured papers onto a surface with dimension-enhancing adhesives, you create visual intrigue and a sense of realism. This technique can make a flat surface come alive with the illusion of three-dimensionality.
Double-sided foam adhesive tape is a prime example of such a material. When you use it to adhere an element to your project, it raises that element above the surface, casting a subtle shadow underneath. This technique can mimic the effect of layering and add a tactile quality to your work, making it more engaging to the viewer.
Moreover, adhesive materials provide versatility in your creative process. They allow you to experiment with different layers and arrangements before committing to a final placement. You can easily reposition elements until you achieve the desired visual impact. This flexibility is particularly valuable in projects where composition and balance play a significant role in the overall aesthetic.
Beyond dimension, adhesive materials can also be used to create texture. When you choose adhesives with unique properties, such as glitter glue or crackle medium, you can add tactile and visual interest to your artwork. These specialized adhesives can transform plain surfaces into textured canvases, enhancing the sensory experience of your piece.
In mixed-media art, where diverse materials and techniques converge, adhesive materials become indispensable for seamlessly integrating different elements. They allow you to affix everything from fabric and metal to found objects and organic materials, ensuring that your composition remains cohesive and visually harmonious.
In conclusion, adhesive materials are far more than tools for attaching items to a surface; they are creative assets that empower artists and crafters to experiment, innovate and elevate their work. By utilizing these materials strategically, you can introduce shadows, depth, texture and dimension to your projects, breathing life and personality into your artistry. Whether you’re crafting a scrapbook, mixed-media masterpiece or any other creative endeavor, adhesive materials are essential allies in your quest to make your work truly captivating and unique.
Should you desire more in-depth information, it’s available for your perusal on this page: Scrapbooking Layouts and Projects – Page 2 – Crafty Concepts with …
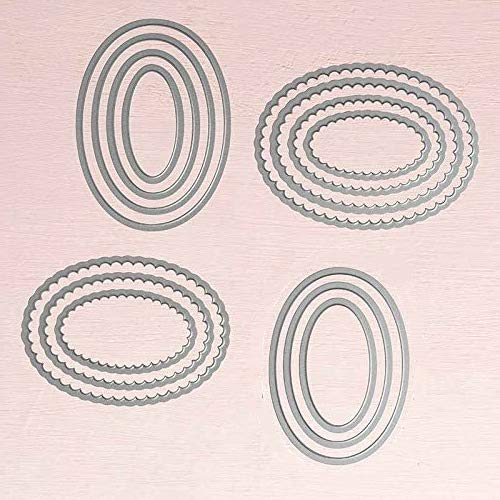
Die-Cut Shapes
Incorporate die-cut shapes or chipboard elements that provide a 3D effect. These can be layered and adorned with additional embellishments.
Adding die-cut shapes or chipboard elements to your creative projects is a fantastic way to infuse them with depth, texture and visual interest. These 3D elements can take your crafting to the next level, allowing you to create eye-catching and captivating designs that truly stand out.
Die-cut shapes, whether they are intricate patterns, elegant frames or playful figures, bring an element of precision and sophistication to your work. They can be used to frame photos, create decorative borders or act as focal points in your design. The possibilities are virtually endless and the versatility of die-cut shapes allows you to tailor them to the theme and style of your project.
Chipboard elements, on the other hand, introduce a sturdy and dimensional quality to your creations. They are ideal for adding depth and weight to your projects. Whether you’re crafting a scrapbook layout, a handmade card or a mixed media piece, chipboard elements can be layered to create stunning visual effects. Their thickness allows you to experiment with different heights and shadowing, adding a tactile and dimensional aspect that draws the viewer’s eye.
To enhance the 3D effect further, consider embellishing your die-cut shapes or chipboard elements. This can involve a wide range of techniques and materials, from adding glitter, paint or ink to applying texture paste, embossing powder or stickers. Embellishing allows you to customize your 3D elements to match the overall theme and color scheme of your project. It also provides an opportunity to add tactile and sensory elements that engage the viewer’s sense of touch.
Layering die-cut shapes and chipboard elements can create intricate and visually striking compositions. By varying the sizes, colors and textures of these elements, you can achieve a harmonious balance that adds depth and dimension to your project. Experiment with different placement and arrangement techniques to find the perfect configuration that conveys your creative vision.
In summary, incorporating die-cut shapes and chipboard elements into your craft projects offers a wealth of creative opportunities. These 3D elements provide depth, texture and visual interest, allowing you to elevate your designs and make them truly unique. Whether you’re crafting for personal enjoyment or creating gifts and keepsakes, the addition of die-cut shapes and chipboard elements can turn an ordinary project into an extraordinary work of art. So, don’t hesitate to explore the endless possibilities of these versatile tools and unleash your creativity in new and exciting ways.
Looking for more insights? You’ll find them right here in our extended coverage: Hip Kit Club Embellishment Kits: Enhance Your Scrapbooking Projects

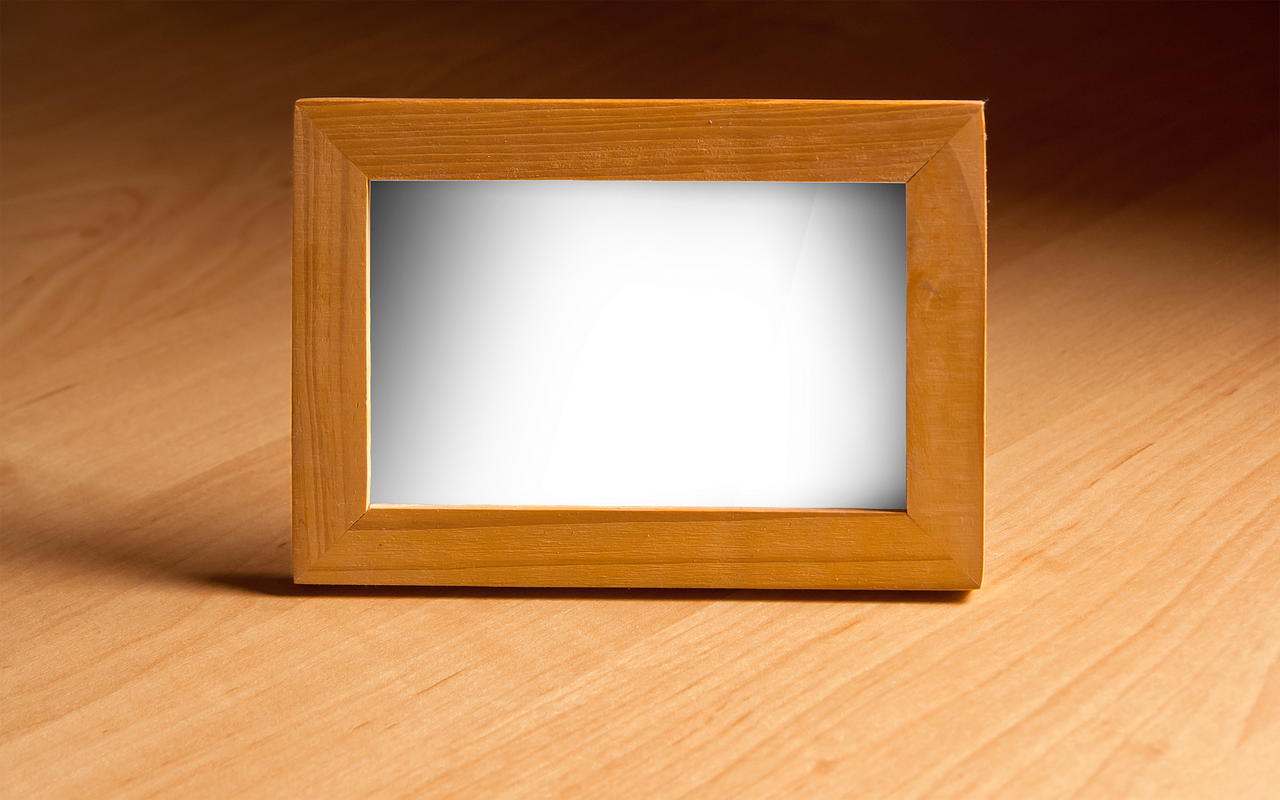
Layered Frames
Create frames for your photos using multiple layers of paper or cardstock. This not only adds dimension but also draws attention to the focal point.
Creating frames for your photos using multiple layers of paper or cardstock is a wonderful way to elevate your photography and add a unique touch to your visuals. Beyond just framing, this technique offers a myriad of creative possibilities that can truly make your photographs stand out and draw the viewer’s attention to the focal point.
1. Depth and Dimension: The layering of paper or cardstock adds depth to your photographs. By strategically placing layers of varying thickness around your image, you create a visual effect that gives the impression of depth. This can make your photos feel more three-dimensional, inviting viewers to explore the scene as if they were there.
2. Emphasizing the Focal Point: One of the key benefits of using layers for framing is the ability to draw the viewer’s attention to the focal point of your photo. By selecting contrasting colors or patterns for your layers, you can create a dynamic contrast that highlights the subject of your image. This makes it easier for viewers to immediately connect with the central element of your photo.
3. Creative Borders: Beyond just traditional rectangular frames, layering paper or cardstock allows you to experiment with various shapes and designs. You can create custom shapes that perfectly complement the content of your photograph. For example, if you’re photographing a beach scene, you could craft layers that resemble waves or seashells, enhancing the thematic elements of the image.
4. Personalization: The use of layered frames is an excellent way to infuse your own style and personality into your photography. You can choose colors, textures and patterns that resonate with your artistic vision, making your photos more distinctive and memorable.
5. Storytelling: Layered frames can be used to tell a story or convey a message. You can add text or symbols within the layers that provide context or narrative to your image. This approach can turn your photos into visual stories, inviting viewers to explore and interpret the message you wish to convey.
6. Experimentation and Exploration: Layering paper or cardstock frames encourages experimentation. It allows you to explore different combinations of materials and styles to find what works best for each photo. Over time, you’ll develop a unique style and a repertoire of framing techniques that can enhance a wide range of subjects.
In essence, creating frames with multiple layers goes beyond the functional aspect of framing; it becomes a creative and artistic endeavor in its own right. It’s a way to add depth, emphasize your subject and infuse your personal touch into your photography. So, the next time you’re looking to make your photos more engaging and visually striking, consider the possibilities of layering and let your creativity take center stage.
For additional details, consider exploring the related content available here 3D Foam Squares Black Small Size – Scrapbook Adhesives by 3L
Less can be more
Avoid overcrowding your page with too many layers or bulky embellishments. Balance is key.
Maintaining a well-balanced scrapbooking layout is not only visually appealing but also enhances the storytelling aspect of your pages. Here are some additional insights into achieving this equilibrium and ensuring that your pages shine without feeling cluttered:
Embrace Negative Space: Negative space, also known as white space, is your friend. Leaving areas of your page blank or with minimal embellishments can draw attention to your focal points and prevent overcrowding. It allows the eye to breathe and makes your designs feel more open and inviting.
Prioritize Your Story: Remember that the primary purpose of scrapbooking is to tell a story or capture a memory. Let the story guide your design choices. Choose embellishments, colors and layouts that enhance and complement the narrative rather than distract from it.
Selective Layering: While layers can add depth and interest to your pages, be selective in their use. Consider using layers to highlight specific elements, such as photos or journaling cards, rather than layering everything on the page. This selective approach ensures that each layer serves a purpose.
Color Cohesion: Maintain a cohesive color scheme throughout your layout. When you have too many colors competing for attention, it can create visual chaos. Select a color palette that complements your photos and theme and use it consistently.
Edit and Simplify: Periodically review your layout and consider whether any elements can be edited or simplified. Sometimes, less is more. Removing non-essential elements or redundant embellishments can streamline your design and improve balance.
Use Visual Anchors: Incorporate visual anchors to guide the viewer’s eye. This can be achieved through the placement of larger or bolder elements strategically on the page. Visual anchors help establish a focal point and create a sense of order.
Maintain Consistency: Consistency in design elements, such as fonts, borders and photo sizes, can contribute to a more harmonious layout. It prevents the page from feeling disjointed and ensures that all elements work together cohesively.
Experiment with Different Layouts: Don’t be afraid to experiment with various layout designs. Different styles, such as grid-based, linear or clustered, can offer unique opportunities for balance. Choose a layout that complements your photos and theme.
Seek Feedback: If you’re unsure about the balance of your page, seek feedback from fellow scrapbookers or friends. Fresh perspectives can help you identify areas where adjustments may be needed.
Practice and Patience: Achieving balance in scrapbooking is an art that improves with practice. Don’t be discouraged if your early layouts feel a bit cluttered. With time and experience, you’ll develop a keen sense of design balance that suits your style.
In conclusion, balance in scrapbooking is about harmonizing all the elements on your page to create a visually pleasing and narrative-rich layout. By embracing negative space, prioritizing your story and applying thoughtful design principles, you’ll be well on your way to creating stunning and balanced scrapbook pages that captivate both your own memories and the eyes of your audience.
Don’t stop here; you can continue your exploration by following this link for more details: Create a Digital Journal Collage – Anna Aspnes Designs
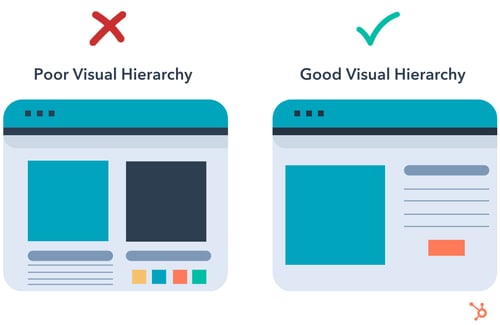
Visual hierarchy
Ensure that your focal photo and main story elements stand out amid the layers.
To create a visually striking and well-organized scrapbook page, it’s essential to ensure that your focal photo and main story elements take center stage, even amid the layers of embellishments and additional elements.
Strategic Placement: Consider the placement of your focal photo and story elements carefully. The rule of thirds can be a helpful guideline. Position them slightly off-center, which often creates a more visually appealing composition. This allows your eye to naturally gravitate towards the most critical elements.
Size and Scale: Use size and scale to your advantage. Make your focal photo larger than other pictures on the page to emphasize its importance. You can also layer smaller photos around it to provide context or tell a story.
Contrast and Color: Enhance contrast between your focal photo and background elements. You can achieve this through various means, such as using a contrasting background paper, adding a subtle drop shadow to your focal photo or framing it with a contrasting border. Additionally, consider using color to draw attention. Make sure your focal photo or elements include colors that stand out against the background.
Whitespace: Embrace whitespace or negative space. This is the uncluttered area around your focal point. Having some empty space around your main elements helps to draw attention to them. It allows the eye to rest and appreciate the central focus without distraction.
Layering Techniques: If you have multiple layers of embellishments or additional elements on your page, be strategic in how you layer them. Place more intricate and eye-catching embellishments farther from the focal point to avoid overshadowing it. You can also create visual depth by layering elements in front of or behind the main photo.
Visual Flow: Consider how the viewer’s eye will naturally move across the page. Use visual cues such as arrows, lines or clusters of elements to guide the eye towards the focal point. Ensure that any journaling or text complements this flow rather than disrupting it.
Storytelling: Connect your focal photo to the story you want to convey. This could be achieved through captions, journaling or supporting elements that provide context. The more your focal point aligns with the narrative, the more powerful it becomes.
Testing and Adjusting: Don’t hesitate to experiment with different layouts and arrangements. You can create digital drafts or arrange physical elements without adhering them permanently. This way, you can make adjustments until you’re satisfied with the way your focal point stands out.
Remember that scrapbooking is a creative endeavor and there are no strict rules. The goal is to ensure that your page effectively communicates your story while showcasing the most important elements prominently. By applying these principles, you can create visually captivating and meaningful scrapbook layouts.
To delve further into this matter, we encourage you to check out the additional resources provided here: 6 Achievable Layering Paper Tips for Eye-Catching Scrapbook …
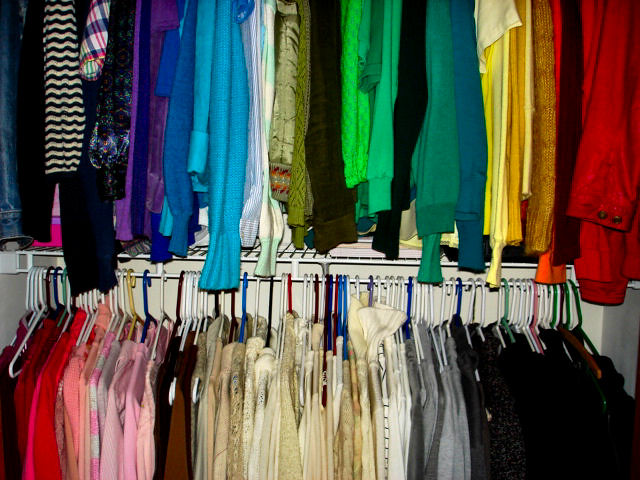
Color coordination
Pay attention to the color palette of your layers to maintain visual cohesion.
When it comes to creating visually appealing designs, paying close attention to your color palette is essential for maintaining visual cohesion. The color scheme you choose can significantly impact how your audience perceives and interacts with your work. Here are some key considerations to keep in mind:
1. Consistency: Consistency is key when it comes to color. Establish a consistent color palette that aligns with your design goals and message. This ensures that your design elements, such as text, graphics and backgrounds, work harmoniously together.
2. Brand Identity: If you’re working on a project for a brand or organization, make sure to adhere to their brand guidelines. Incorporate the brand’s colors to maintain brand identity and recognition. Consistency in branding helps build trust and recognition with your audience.
3. Emotion and Mood: Colors have the power to evoke specific emotions and set the mood of your design. For example, warm colors like red and orange can convey energy and excitement, while cool colors like blue and green can create a sense of calm and tranquility. Consider the emotional impact you want to achieve and choose your colors accordingly.
4. Contrast: Contrast is essential for readability and visual interest. Use color contrast to make important elements stand out, such as headlines or call-to-action buttons. This not only enhances the visual hierarchy of your design but also guides the viewer’s attention.
5. Accessibility: Ensure that your color choices are accessible to all users, including those with visual impairments. Use color contrast tools to verify that text is readable against its background. Additionally, consider providing alternative text or patterns for color-coded information to accommodate diverse audiences.
6. Trends vs. Timelessness: While it’s tempting to follow design trends, consider the longevity of your project. Trendy color schemes may become outdated quickly. Opt for a combination of classic and trend-inspired colors to strike a balance between contemporary appeal and timeless design.
7. Test and Iterate: Don’t hesitate to test your color palette with a sample audience or colleagues. Gather feedback on how the colors resonate with your target audience and whether they effectively convey your message. Be open to iterating and refining your color choices based on feedback.
8. Cultural Considerations: Be mindful of cultural connotations associated with colors. Colors can have different meanings in various cultures, so research and understand the cultural context of your target audience to avoid misunderstandings.
In summary, the color palette you choose plays a significant role in the overall impact and effectiveness of your design. By maintaining visual cohesion through thoughtful color selection and consistency, you can create designs that resonate with your audience, convey your message effectively and leave a lasting impression.
You can also read more about this here: Adding Dimension to Your Scrapbooking: Embellishments and …
Experiment
Don’t be afraid to try new techniques and combinations. Scrapbooking is an ever-evolving art form.
Certainly! Here’s an extended idea:
“Don’t be afraid to embark on a creative journey filled with experimentation and innovation in your scrapbooking endeavors. Scrapbooking is not just a craft; it’s a dynamic and ever-evolving art form that invites you to push boundaries and discover your unique creative voice.
One of the most exciting aspects of scrapbooking is the limitless possibilities it offers. You have the freedom to explore new techniques, experiment with a wide spectrum of colors, textures and materials and even combine different styles to create something truly extraordinary. Whether you’re a seasoned scrapbooking enthusiast or just starting, the journey is about growth and discovery.
Consider incorporating mixed media elements, like watercolors, acrylic paints or fabric, into your layouts to add depth and texture. Explore various paper-cutting techniques, such as intricate die-cut designs or the trendy art of paper quilling, to give your pages a distinct and artistic flair. The world of embellishments is vast, from traditional stickers and brads to unique finds like vintage buttons, lace or even pressed flowers, offering endless opportunities to infuse your layouts with character.
As you delve into new techniques and combinations, remember that there’s no right or wrong way to scrapbook. Your creativity knows no bounds and each project is a reflection of your unique perspective and personal experiences. Be open to inspiration from various sources, such as nature, travel or everyday life and let these influences guide your artistic choices.
Scrapbooking isn’t just about preserving memories; it’s also about expressing yourself, capturing emotions and telling your story in a visually compelling way. So, embrace the spirit of innovation, don’t be afraid to make mistakes and allow yourself to grow as an artist. Your scrapbooking journey is a testament to your creative evolution and with each new technique and combination you explore, you’re adding another layer of depth to your craft.
In essence, scrapbooking is a canvas waiting to be painted with your imagination. It’s an art form that thrives on exploration and experimentation. So, whether you’re creating a cherished family album or crafting a unique piece of art, remember that your creativity is boundless and the possibilities are endless. With every page you create, you’re not just scrapbooking; you’re evolving as an artist, one beautiful layout at a time.”
Should you desire more in-depth information, it’s available for your perusal on this page: La-La Land Crafts Layered Travel Die 8777 – Simon Says Stamp
Preserving Memories with Artistry
Scrapbooking is a wonderful blend of creativity and storytelling and layering with dimension adds an artistic flair that transforms a page of photos into a visual narrative. Whether you’re commemorating a special occasion, documenting family history or simply expressing your artistic side, the art of layering and dimension in scrapbooking elevates the craft to new heights. So, gather your photos, papers and embellishments and let your memories come to life in layers and dimension on the pages of your scrapbook.
Scrapbooking, often hailed as a crafty time capsule, is a delightful marriage of creativity and storytelling. It’s a means of immortalizing cherished memories and weaving them into a visual narrative that transcends the limitations of time and memory. In the world of scrapbooking, layering with dimension is the secret ingredient that turns a mere collection of photos into a work of art, breathing life into the pages of your album.
Picture this: a page filled with photographs, each snapshot a frozen moment in time, but what if you could enhance these pictures with layers of texture, color and sentiment? That’s where the magic of dimension comes in. By adding layers of paper, embellishments and decorative elements, you infuse your scrapbook with a captivating depth that draws the viewer in, inviting them to explore the story behind the images.
Scrapbooking is an incredibly versatile art form. Whether you’re celebrating a milestone birthday, preserving the legacy of your ancestors or just channeling your inner artist, the art of layering and dimension elevates your creative journey to unprecedented heights. It’s a way to encapsulate the essence of an event, an era or a person, making the memories tangible and tactile.
One of the joys of scrapbooking is the endless array of possibilities it offers. The choice of papers, fonts, colors and embellishments is yours to make, allowing you to customize each page to perfectly reflect the mood and significance of the moment you’re capturing. The act of selecting these elements becomes an exercise in storytelling, as you intentionally choose items that complement and enhance the narrative.
As you gather your photos, select your papers and sift through your collection of embellishments, you’re not just crafting a scrapbook; you’re crafting a visual story that will be passed down through generations. The layers and dimension you add aren’t merely decorative; they’re the brushstrokes of your artistic expression, the carefully chosen words of your narrative.
So, embrace the world of scrapbooking and let your memories flourish in layers and dimensions on the pages of your scrapbook. Celebrate your creativity, your history and your unique perspective on the world. With each layout, you’re not just preserving moments; you’re crafting a masterpiece that will evoke emotions, spark conversations and stand as a testament to the power of storytelling through art. Dive into this craft with enthusiasm and watch as your memories come to life in ways you never thought possible.
Should you desire more in-depth information, it’s available for your perusal on this page: 10+ Tips on How to Scrapbook Like a Pro — Root & Branch Paper Co.
More links
Looking for more insights? You’ll find them right here in our extended coverage: Beautiful Card Ideas for Using Printed Paper Packs – Altenew