Table of Contents
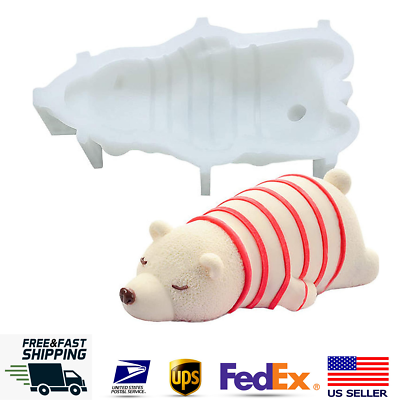
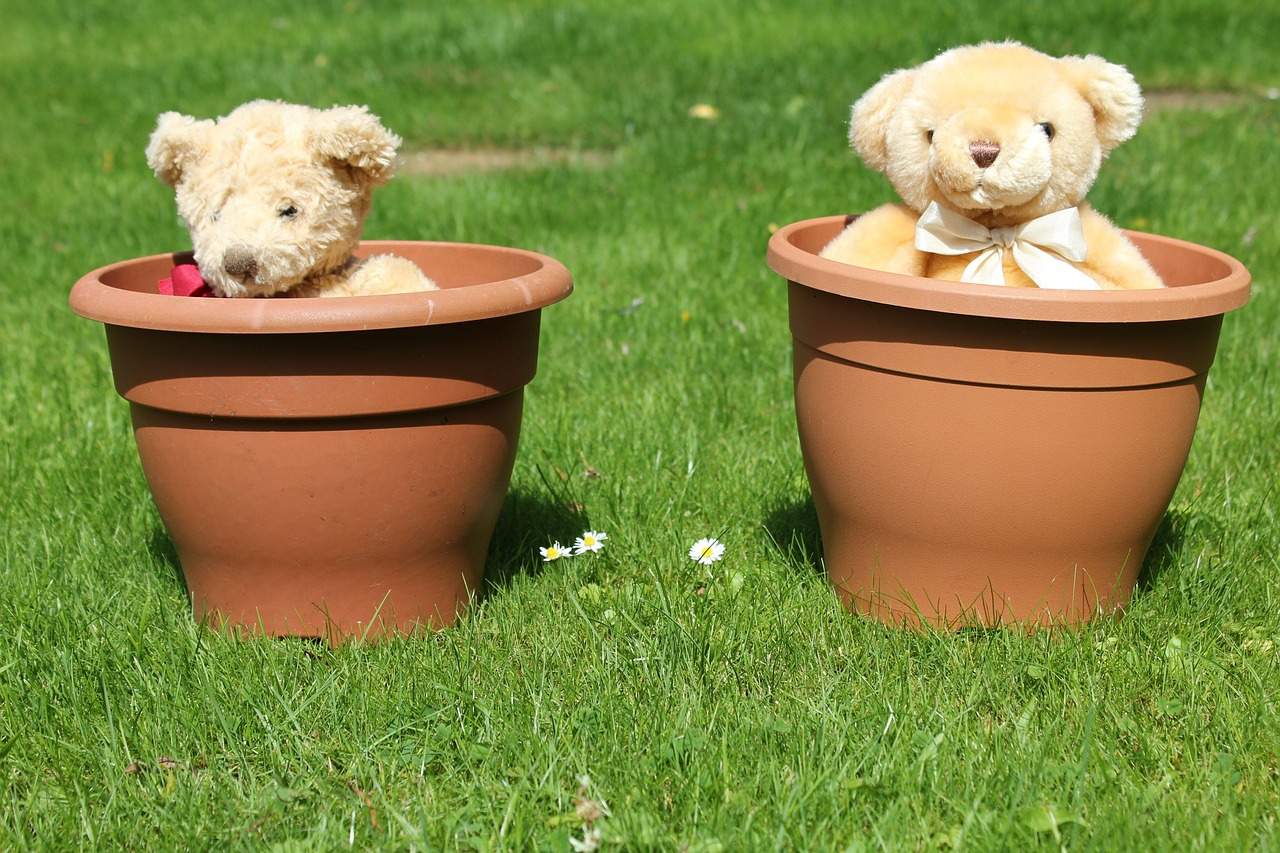
In a world filled with mass-produced toys, there’s something truly special about creating your own Plush Sleepy Bear. Not only does it allow you to personalize every detail, but it also imbues your bear with the love and care that went into its creation. In this article, we’ll explore the delightful world of DIY Plush Sleepy Bears and guide you through the steps of crafting your very own cuddly companion.
Amidst a world brimming with mass-produced toys, there exists a uniquely enchanting experience—crafting your very own Plush Sleepy Bear. This creative endeavor goes beyond the ordinary, offering a treasure trove of personalized details that turn a mere toy into an embodiment of love and care. In this article, we embark on a delightful journey into the realm of DIY Plush Sleepy Bears, inviting you to unlock the magic of crafting your very own cuddly companion from scratch.
1. Personalized Perfection: DIY Plush Sleepy Bears are blank canvases awaiting your creative touch. You have the freedom to choose every detail, from the fabric to the color, size and even the bear’s facial expression. This level of personalization ensures that your bear is a true reflection of your vision and preferences.
2. A Labor of Love: Crafting a Plush Sleepy Bear is a labor of love. With each stitch, you infuse your bear with your care and attention. It becomes more than just a toy; it becomes a symbol of the dedication and affection that went into its creation.
3. A Bonding Experience: If you’re creating a DIY Plush Sleepy Bear with a child or loved one, it becomes a bonding experience filled with shared laughter, creativity and collaboration. This shared endeavor strengthens connections and creates cherished memories.
4. Tailored to Your Needs: You can customize your bear to cater to specific needs or preferences. Whether you want it to be hypoallergenic, possess certain textures or have unique features, DIY Plush Sleepy Bears can be tailored to meet your requirements.
5. Lifelong Companions: Bears crafted with your own hands hold a special place in your heart. They often become lifelong companions, evoking fond memories and emotions that resonate throughout your life.
6. Creative Expression: Crafting your own bear is a form of creative expression. It allows you to tap into your artistic side, experiment with colors and patterns and bring your vision to life in a tangible and huggable form.
7. Unique Gifts: DIY Plush Sleepy Bears make thoughtful and one-of-a-kind gifts for loved ones. Whether it’s a birthday, holiday or a special occasion, gifting a handmade bear conveys a deep level of care and consideration.
8. Sustainability: By crafting your own bear, you have control over the materials used, promoting sustainability and ethical choices in toy-making. You can select eco-friendly fabrics and stuffing to align with your values.
In conclusion, the world of DIY Plush Sleepy Bears is a realm of endless creativity, personalization and heartfelt connections. Crafting your very own cuddly companion is an opportunity to infuse a toy with love, care and unique characteristics that make it truly special. Whether you’re creating it for yourself, with a loved one or as a gift, the process is a magical journey that yields a one-of-a-kind bear, bound to become a cherished part of your life’s tapestry.
For additional details, consider exploring the related content available here Loveys for Babies: How to Introduce One and What to Do if Your Kid …
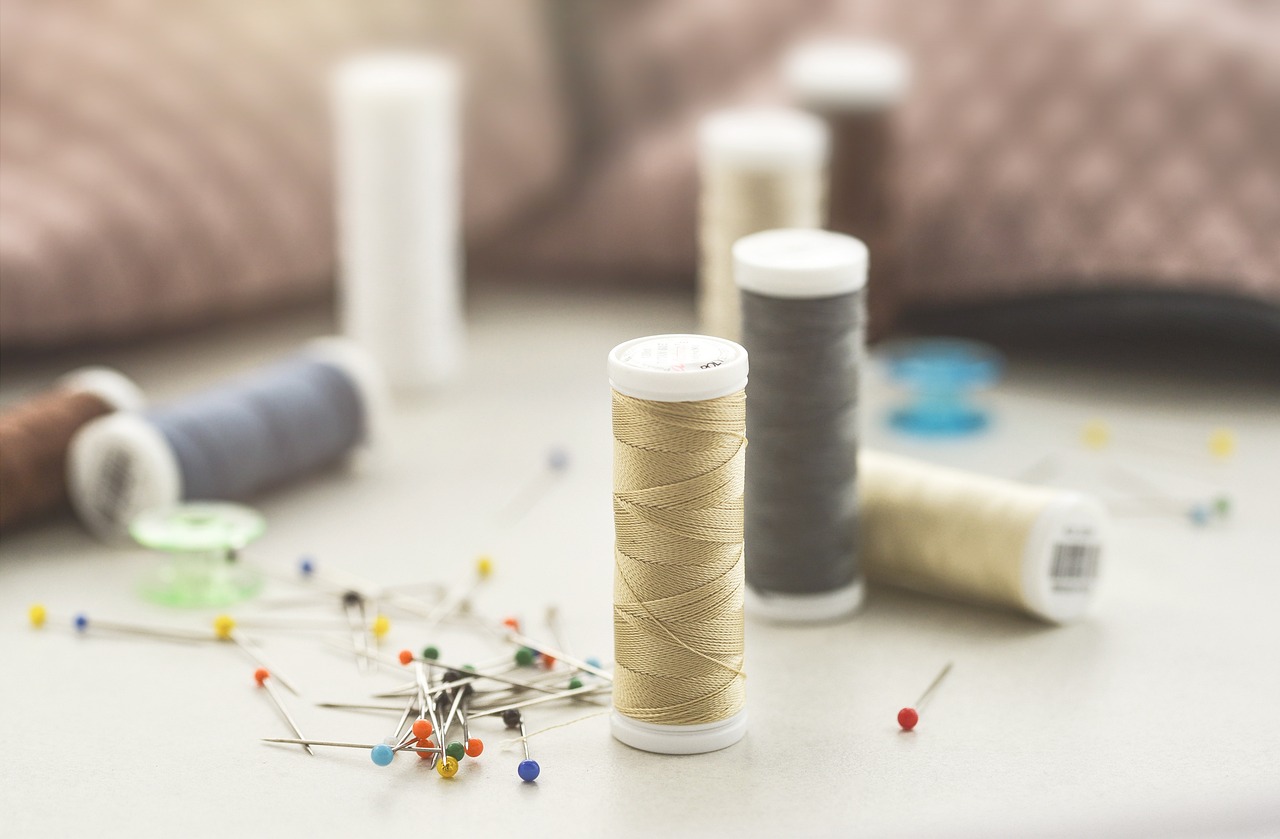
Choosing Your Materials
The first step in creating a DIY Plush Sleepy Bear is to gather your materials. You’ll need:
The first step in creating a DIY Plush Sleepy Bear is to gather your materials. This preparatory stage is essential to ensure a smooth and enjoyable crafting process. Here’s a detailed list of the materials you’ll need:
Fabric: Select a soft, cuddly fabric for the bear’s body. Common choices include plush fleece, minky or velour. The color and texture are entirely up to your preferences and creativity.
Bear Pattern: Obtain a bear pattern or template to serve as a guide for cutting and sewing. You can find free patterns online or purchase them from craft stores. Ensure the pattern is appropriate for the size of bear you want to create.
Scissors: Sharp fabric scissors are a must for precise cutting. Make sure they are comfortable to use and capable of cutting through your chosen fabric.
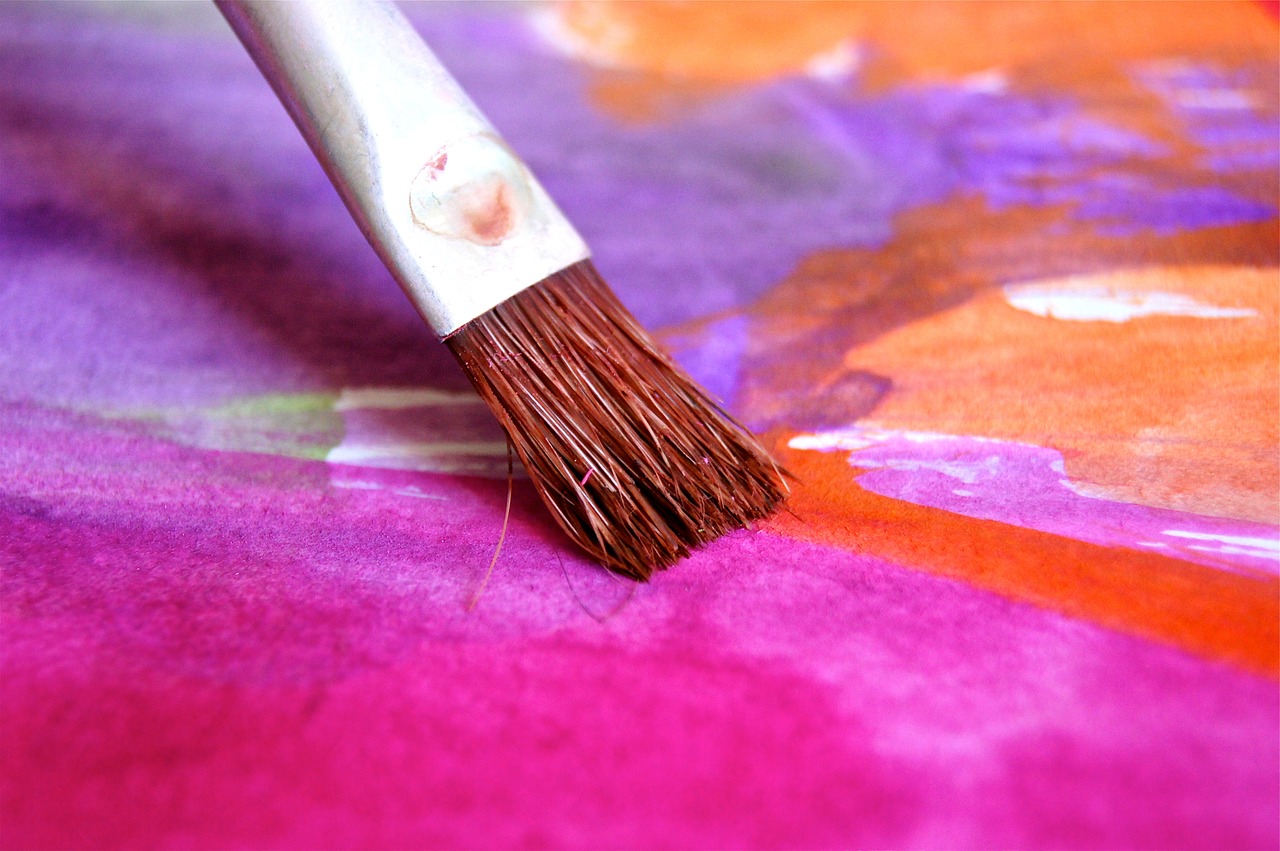
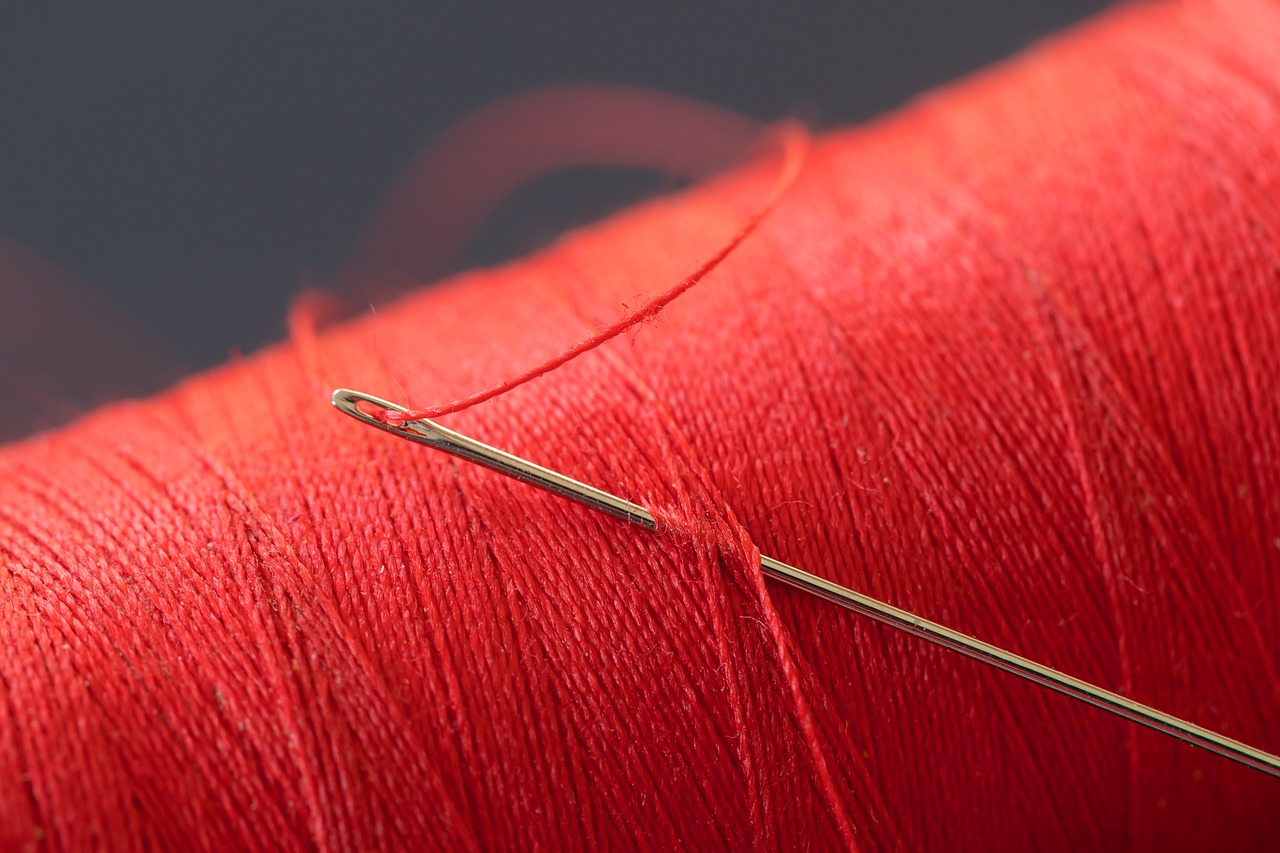
Needle and Thread: High-quality sewing needles and strong thread are essential for stitching the bear’s body together. Choose a thread color that matches your fabric or provides a contrasting accent, depending on your design.
Pins: Straight pins or clips are useful for holding fabric pieces in place while you sew. They help ensure that your bear’s parts align correctly during the assembly process.
Stuffing: Use high-quality polyester fiberfill or stuffing material designed for plush toys. Ensure it’s hypoallergenic and suitable for children’s toys.
Safety Eyes and Nose: If you want to add features like eyes and a nose, consider using safety eyes (plastic eyes with washers) or embroidery floss for stitching facial features. Ensure they are child-safe and securely attached.
Fabric Markers or Embroidery Thread: If you’d like to add details like facial expressions or designs on your bear’s clothing, fabric markers or embroidery thread can be handy.
Optional Accessories: Depending on your bear’s design, you may want to include accessories like a ribbon bow, a tiny scarf or a miniature plush toy. Gather these items in advance if they are part of your vision.
Sewing Machine (optional): While you can hand-sew your Plush Sleepy Bear, a sewing machine can make the process faster and more efficient, especially if you plan to create multiple bears.
Batting or Padding (optional): If you desire a bear with a plumper or more cushioned appearance, consider using batting or additional padding material. This can help achieve the desired level of fullness and softness.
Felt (for features, if not using safety eyes): If you choose to create facial features like eyes and a nose using felt, ensure you have the appropriate colors of felt fabric on hand.
Before you begin crafting your Plush Sleepy Bear, take some time to review your chosen pattern and familiarize yourself with the assembly instructions. With these materials in hand and a clear plan in mind, you’ll be well-prepared to embark on a delightful DIY adventure to create a cuddly companion that’s uniquely yours.
Looking for more insights? You’ll find them right here in our extended coverage: Nine Things to Consider Before Buying a Costco Giant Teddy

Fabric
Select a soft, cuddly fabric for the bear’s body. Plush or fleece materials work wonderfully for that cozy, huggable feel.
Selecting the right fabric for a Plush Sleepy Bear’s body is a crucial step in ensuring its cuddliness and comfort. When it comes to creating that irresistible, huggable feel, softness is the key and materials like plush or fleece are the top choices.
Plush fabric, known for its velvety softness and luxurious texture, is a popular pick for crafting these lovable bears. Its dense pile gives the bear a cloud-like, snuggly quality that invites warm embraces. Running your fingers along a plush bear’s fur is like touching a piece of pure comfort, making it an ideal choice for a bear that’s meant to provide solace and companionship.
Fleece, another fantastic option, offers a slightly different but equally cozy feel. It’s known for its warmth and fuzziness, providing a soft and inviting texture that children find incredibly comforting. Fleece Plush Sleepy Bears are not only delightful to hold but also help keep little ones warm during those chilly nights.
Both plush and fleece materials have a gentle, soothing touch that makes them perfect for cuddling. They offer a tactile experience that is both comforting and calming, making them ideal choices for bedtime companions.
Moreover, these materials are durable and easy to care for, which is a practical consideration for a well-loved bear that’s sure to see its fair share of snuggles and adventures. They stand up well to repeated hugs, washings and playtime, ensuring that the bear remains a steadfast source of comfort for years to come.
So, whether you choose plush or fleece, rest assured that you’re selecting a fabric that embodies the essence of softness and cuddliness, creating the perfect foundation for a Plush Sleepy Bear that will be cherished and embraced for generations.
Don’t stop here; you can continue your exploration by following this link for more details: The Case for Sleeping With Stuffed Animals as an Adult | Wirecutter

Pattern
Find a bear pattern that suits your style. You can purchase patterns online or create your own by sketching it out on paper.
Choosing the right bear pattern is a delightful and creative part of bringing your very own Plush Sleepy Bear to life. Whether you opt for a pre-designed pattern or decide to embark on a DIY journey by sketching your bear, the pattern you select will set the stage for a unique and cherished companion. Here’s an exploration of why finding the perfect bear pattern is a step filled with possibilities:
Reflecting Your Style: Bear patterns come in a wide array of styles, from classic and traditional to modern and whimsical. Selecting a pattern that resonates with your personal style allows you to infuse your unique creativity into the bear’s design. It’s a chance to create a bear that feels perfectly “you.”
Online Resources: The internet offers a treasure trove of bear patterns, both free and for purchase. Exploring these online resources opens up a world of possibilities. You can find patterns that match your vision or discover unexpected designs that spark your imagination.
Customization Potential: When creating your own bear pattern, you have the freedom to customize every detail. From the size and shape of the bear to the choice of fabric and color palette, this DIY approach allows you to craft a bear that aligns precisely with your preferences and vision.
Craftsmanship and Quality: The quality of the pattern you choose greatly influences the final product. Well-designed patterns provide clear instructions, ensuring that your bear is constructed with skill and attention to detail. This translates into a professionally crafted and durable companion.
Family Heirlooms: Many individuals choose to use a family bear pattern that has been passed down through generations. This adds a layer of sentimental value to the bear, as it carries the legacy of family craftsmanship and love.
Design Versatility: Bear patterns can be adapted to suit various occasions and themes. Whether you’re crafting a bear for a special event, holiday or as a gift, the right pattern can be transformed to match the occasion, making your creation even more meaningful.
Learning and Creativity: For those who enjoy sewing as a hobby, creating your own bear pattern can be a rewarding and educational experience. It allows you to experiment with design elements, explore new sewing techniques and foster your creativity.
A Personal Touch: Handmade items often carry a personal touch that store-bought products lack. When you sketch your own bear pattern, you imbue the creation with your own energy, care and love, making it truly one-of-a-kind.
Teaching and Bonding: If you involve children or family members in the process of selecting or creating a bear pattern, it becomes an opportunity for bonding and teaching valuable crafting skills. It’s a chance to share creativity and knowledge across generations.
Sense of Accomplishment: Successfully bringing a bear to life from a chosen pattern or your own design can be incredibly satisfying. It offers a sense of accomplishment and pride in your crafting abilities, which can boost your confidence and inspire future creative projects.
In summary, finding or creating the perfect bear pattern is a significant step in the journey of crafting your very own Plush Sleepy Bear. It’s an opportunity to infuse your style, creativity and personal touch into the bear’s design, resulting in a unique companion that holds a special place in your heart and home. Whether you follow a pattern or sketch your own, this creative endeavor is sure to bring joy and fulfillment to both the maker and the eventual owner of the cuddly bear.
Should you desire more in-depth information, it’s available for your perusal on this page: Amazon.com: PetPrime Dog Plush Toy Heart Beat Puppy Plush …
Thread
High-quality sewing thread in a color that matches your fabric.
When embarking on sewing projects, the choice of sewing thread is a critical consideration that often goes overlooked. Opting for high-quality sewing thread in a color that perfectly matches your fabric can make a significant difference in the outcome of your sewing endeavors. Here’s why this choice matters:
1. Seamless Aesthetics: Selecting a thread color that matches your fabric ensures that your stitches blend seamlessly into the fabric’s design. This cohesion creates a polished and professional look, whether you’re sewing clothing, home decor or quilts. The thread becomes virtually invisible, allowing the fabric to shine.
2. Enhanced Durability: High-quality sewing thread is designed to withstand wear and tear. When the thread color matches the fabric, it not only looks better but also performs better. The thread complements the fabric’s structural integrity, resulting in more durable seams and stitches that are less prone to fraying or breaking.
3. Attention to Detail: Meticulous attention to detail sets the tone for exceptional sewing projects. When you take the time to select thread that harmonizes with your fabric, it demonstrates your commitment to craftsmanship. This attention to detail can elevate your sewing work from good to outstanding.
4. Versatile Aesthetic: Matching thread is versatile and can work with various fabric colors and patterns. Unlike contrasting thread colors, which may limit your options, matching thread allows you to use the same thread for multiple projects, making it a cost-effective choice.
5. Flaw Concealment: In the event of minor imperfections or irregularities in your stitching, matching thread is forgiving. It helps conceal these flaws and inconsistencies, ensuring that they are less noticeable to the eye.
6. Cohesive Design: When your thread color aligns with your fabric, it contributes to a cohesive and harmonious design. Whether you’re creating a garment, crafting accessories or working on home decor, this unity in design elements enhances the overall aesthetic appeal of your project.
7. Tailored Look: For sewing projects that require a tailored or elegant appearance, such as formal wear or upholstery, matching thread is essential. It contributes to a refined, put-together look that reflects your attention to precision and style.
8. Quilting Excellence: In quilting, thread choice is paramount. Matching thread allows your quilt’s intricate patterns and designs to shine without distraction. It helps achieve a visually pleasing quilt top and reinforces the overall quilt structure.
In conclusion, the choice of high-quality sewing thread in a color that complements your fabric is a fundamental aspect of successful sewing projects. It enhances the aesthetics, durability and overall quality of your creations. Whether you’re a seasoned seamstress or a novice crafter, this seemingly small detail can make a significant impact on the final result, ensuring that your sewing projects are not only functional but also visually pleasing and expertly crafted.
For additional details, consider exploring the related content available here Original Snuggle Puppy Heartbeat Stuffed Toy for … – Amazon.com

Stuffing
Opt for hypoallergenic, non-toxic stuffing to ensure your bear is safe and cuddly.
Selecting the right stuffing for your Plush Sleepy Bear is a crucial decision that impacts not only the bear’s cuddliness but also the health and well-being of the child. Opting for hypoallergenic, non-toxic stuffing goes a long way in ensuring that your bear is both safe and irresistibly cuddly. Here’s why it matters:
Hypoallergenic Assurance: Plush Sleepy Bears filled with hypoallergenic stuffing are an excellent choice, especially for children with allergies or sensitive skin. Hypoallergenic stuffing is designed to minimize allergen exposure, reducing the risk of allergic reactions, skin irritations or respiratory issues.
Safe for Chewing and Mouthing: Children, especially infants and toddlers, often explore their world by putting objects in their mouths. Choosing non-toxic stuffing ensures that even if your child decides to give their bear a taste, there’s no risk of exposure to harmful chemicals or substances.
Durability and Longevity: High-quality non-toxic stuffing is designed to withstand regular cuddling, hugging and squeezing. It maintains its fluffiness and shape over time, ensuring that your bear remains cuddly and comforting for years to come.
Ease of Cleaning: Inevitably, Plush Sleepy Bears may encounter spills or accidents. Opting for non-toxic stuffing makes it easier to clean the bear when necessary. You can confidently wash the bear without worrying about chemicals leaching into the fabric.
Odor-Free Comfort: Non-toxic stuffing doesn’t emit any unpleasant odors or off-gassing, providing a pure and odor-free cuddling experience. This is particularly important for children who may have heightened sensitivity to smells.
Responsible and Eco-Friendly: Many non-toxic stuffing materials are eco-friendly and sustainable. Choosing bears with eco-conscious stuffing options reflects a commitment to responsible consumption and a healthier planet.
Peace of Mind for Parents: Parents can have peace of mind knowing that their child’s beloved bear is made with safe and non-harmful materials. This assurance translates to worry-free playtime and cuddles.
Ethical Manufacturing: Supporting manufacturers who use non-toxic stuffing often aligns with ethical and responsible production practices. These manufacturers prioritize the safety and well-being of their customers, including children.
Reduced Risk of Irritation: Non-toxic stuffing minimizes the risk of skin irritation or discomfort when children snuggle up to their bears for extended periods. It ensures that the cuddling experience remains enjoyable and irritation-free.
Compliance with Safety Standards: Plush Sleepy Bears with non-toxic stuffing are more likely to meet safety standards and regulations. These bears are designed with the health and safety of children in mind and their manufacturing processes are more likely to adhere to strict quality control measures.
In summary, opting for hypoallergenic, non-toxic stuffing for your Plush Sleepy Bear is a thoughtful and responsible choice. It prioritizes the safety, comfort and well-being of children while also ensuring that the bear remains cuddly, durable and an enduring source of comfort and companionship. It’s a decision that provides both peace of mind for parents and endless cuddles for children.
To delve further into this matter, we encourage you to check out the additional resources provided here: Make a Custom Stuffed Animal of Your Cat | Petsies
Needles and Pins
A variety of sewing needles and pins for different parts of the sewing process.
When it comes to sewing, having a variety of sewing needles and pins at your disposal is essential for ensuring the success and ease of your sewing projects. Here’s why:
1. Precision in Stitching: Different sewing tasks require different types of needles. For instance, a fine needle is ideal for delicate fabrics like silk, while a heavy-duty needle is necessary for sewing through thick materials like denim or leather. Having a variety of needles allows you to select the one that best suits your fabric, ensuring precise and clean stitching.
2. Compatibility with Thread: The thickness and type of thread you use play a crucial role in your sewing project’s success. Different needles are designed to work with specific thread types, ensuring that the thread flows smoothly and does not break or snag during stitching.
3. Versatility: Sewing needles and pins come in various sizes and shapes, making them suitable for various sewing techniques and tasks. For example, ballpoint needles are excellent for knits, while quilting needles are designed for quilting projects. This versatility allows you to tackle a wide range of sewing projects effectively.
4. Seam Perfection: The right needle helps create perfect seams. Using the appropriate needle prevents issues like skipped stitches, fabric puckering or fabric damage. It ensures that your seams are neat, durable and aesthetically pleasing.
5. Ease of Use: Sewing needles and pins come in different lengths and thicknesses. Longer needles are helpful for tasks like hand basting, while shorter needles are ideal for precision work. Selecting the right needle ensures comfort and ease during sewing, reducing hand fatigue.
6. Specialized Needles: Some sewing projects require specialized needles, such as embroidery or quilting needles. These needles have unique features that enhance their performance in their respective tasks, such as larger eyes for thicker threads or tapered points for piercing multiple layers of fabric.
7. Tailoring to Fabric Types: Different fabrics have unique properties that affect how they respond to sewing. Needles designed for specific fabric types, like stretch or microfiber needles, are essential for achieving professional results without damaging the material.
8. Preventing Snags and Runs: Pins are indispensable for holding fabric pieces together before sewing. The type of pin used can affect the fabric’s integrity. T-pins, for instance, are great for heavier fabrics, while silk pins are designed for delicate materials. Using the right pins prevents snags, runs or damage to the fabric.
9. Organization and Efficiency: Having a variety of sewing needles and pins neatly organized in a pin cushion or container allows for efficient work. You can quickly access the needed needle or pin without interrupting your sewing flow, saving time and frustration.
In conclusion, a well-curated collection of sewing needles and pins is a valuable asset for any sewing enthusiast or professional. It ensures that you have the right tools for the job, enhances the quality of your sewing work and makes the entire sewing process more enjoyable and efficient. Whether you’re a beginner or an experienced seamstress, having a diverse selection of needles and pins is a key to successful and satisfying sewing projects.
To expand your knowledge on this subject, make sure to read on at this location: Simulation Lovely Dog That Make Sounds Doll Cute Sleeping Plush …
Sewing Machine
While you can sew your bear by hand, a sewing machine will make the process faster and more efficient.
While you can certainly create your bear by hand, there are several compelling reasons why using a sewing machine can greatly enhance the process, making it faster and more efficient.
Speed and Efficiency: Sewing machines are designed for speed and precision. They can stitch fabric together rapidly and consistently, reducing the time required to complete your bear. This efficiency can be especially beneficial if you’re making multiple bears or working on a complex design.
Consistency: Sewing machines produce uniform stitches, ensuring that your bear’s seams are strong and durable. Hand-sewn stitches may vary in size and tension, potentially leading to uneven or weak seams. With a sewing machine, you can achieve a professional finish that not only looks great but also enhances the bear’s longevity.
Versatility: Sewing machines offer a wide range of stitch options and settings. This versatility allows you to customize your bear’s construction to your specific preferences. You can choose different stitch lengths, types and patterns to achieve the desired look and functionality, such as reinforced seams or decorative embellishments.
Complex Stitching: Some bear designs require intricate and precise stitching, which can be challenging to achieve by hand. Sewing machines excel in handling complex patterns and can easily tackle tasks like creating jointed limbs or adding detailed facial features.
Reduced Hand Fatigue: Hand-sewing can be physically demanding, particularly for larger or more intricate projects like plush bears. Using a sewing machine reduces the strain on your hands and wrists, allowing you to work comfortably for longer periods without discomfort or fatigue.
Professional Finish: Sewing machines produce clean, polished seams that resemble commercially manufactured plush toys. This professional appearance can make your homemade bear look and feel like a high-quality, store-bought product, enhancing its overall appeal.
Productivity: If you plan to create bears for sale or as gifts for a larger audience, a sewing machine can significantly boost your productivity. It allows you to produce more bears in less time, making your creative endeavors more efficient and cost-effective.
Precision and Accuracy: Sewing machines provide precise control over stitch placement and alignment. This accuracy is essential when working on intricate details or patterns, ensuring that your bear’s features are symmetrical and well-proportioned.
In conclusion, while hand-sewing a bear can be a rewarding and meditative craft, using a sewing machine offers numerous advantages in terms of speed, consistency, versatility and professional finish. Whether you’re a seasoned sewer or a novice, a sewing machine can streamline the bear-making process and help you create high-quality, durable and visually appealing plush Sleepy Bears more efficiently.
If you’d like to dive deeper into this subject, there’s more to discover on this page: 7 Reasons Adults Should Have Stuffed Animals Too | Mental Health

Cutting and Sewing
Once you have your materials ready, it’s time to start cutting and sewing your bear. Here’s a simplified overview of the process:
Once you’ve gathered your materials and are ready to embark on the creative journey of making your own Plush Sleepy Bear, it’s essential to understand the step-by-step process involved. Here’s a simplified overview of how to cut and sew your bear:
1. Pattern Selection: Begin by choosing a bear pattern that suits your preferences and skill level. Patterns can vary in complexity, so pick one that matches your sewing experience. You can find patterns in craft stores, online marketplaces or create your own if you’re feeling adventurous.
2. Material Selection: Select your materials carefully. Choose a soft, durable fabric for the bear’s body. Common choices include plush fleece, minky or cotton. Ensure you have enough fabric for both the front and back of the bear. You’ll also need thread that matches the fabric, sewing needles, pins and stuffing material like polyester fiberfill.
3. Cutting the Fabric: Lay your chosen fabric on a flat surface and place the bear pattern on top. Pin the pattern securely to the fabric to prevent shifting. Use sharp scissors to carefully cut along the pattern’s outline. Remember to cut two identical pieces for the front and back of the bear.
4. Sewing the Pieces: With your fabric pieces ready, it’s time to start sewing. Begin with the bear’s face. Sew on buttons or embroider facial features like eyes, nose and mouth. Ensure these features are securely attached, especially if the bear is intended for young children.
5. Stitching the Bear: Place the front and back fabric pieces together, with the right sides facing each other. Pin the pieces together along the edges, leaving a small opening for turning and stuffing. Sew along the pinned edges using a straight stitch, leaving the opening unsewn.
6. Turning and Stuffing: Carefully turn the bear inside out through the opening. Use a blunt object, like a chopstick or the back of a pencil, to gently push out the bear’s limbs and facial features, ensuring they are well-defined. Now, it’s time to stuff the bear with polyester fiberfill to your desired level of plumpness. Use small amounts at a time, evenly distributing it for a uniform appearance.
7. Closing the Opening: Once your bear is stuffed to your satisfaction, carefully hand-sew the opening closed using a slip stitch. Make sure your stitches are secure to prevent any stuffing from escaping.
8. Final Touches: After closing the opening, you can add any final touches or embellishments you desire. This might include a ribbon bow, a personalized tag or a heart-shaped patch with a special message. Be creative and make the bear uniquely yours.
9. Finishing Details: Give your bear a final once-over to ensure all seams are secure and there are no loose threads. Trim any excess fabric or thread if needed. Your handmade Plush Sleepy Bear is now complete and ready to provide comfort and companionship.
10. Personalization: Consider personalizing your bear by embroidering a name or date on its paw or adding a special note inside. This adds a heartfelt touch that makes the bear even more meaningful.
Remember that creating your own Plush Sleepy Bear can be a delightful and rewarding project. It allows you to infuse your creativity, love and personal touch into a cherished companion that can bring comfort and joy for generations to come. Enjoy the journey of crafting your bear and don’t forget to add your unique personality to every stitch!
Don’t stop here; you can continue your exploration by following this link for more details: Sewing for Baby: Make a Baseball Buddy Soft Toy

Cutting
Follow your bear pattern to cut out the various pieces – usually, there are two identical pieces for the body and additional pieces for the ears, eyes and nose.
Certainly, following your bear pattern to cut out the various pieces is a fundamental step in creating a Plush Sleepy Bear and attention to detail during this stage is crucial to ensure a well-crafted and huggable companion. Let’s delve deeper into this important process:
1. Precision and Consistency:
- Cutting out the pieces according to the bear pattern demands precision. Ensuring that the pieces are cut accurately and uniformly is essential for the bear’s symmetry and overall appearance.
2. Symmetry and Balance:
- Plush Sleepy Bears are known for their symmetrical and balanced design. Cutting identical pieces for the body is essential to achieve the bear’s signature shape and ensure that all features align harmoniously.
3. Attention to Detail:
- Additional pieces for the ears, eyes and nose contribute to the bear’s personality and character. These details should be cut with care to capture the essence of the bear’s expression and charm.
4. Seam Allowance:
- Bear patterns typically include a seam allowance to account for stitching. Cutting the pieces with the proper seam allowance ensures that they can be sewn together securely without compromising the bear’s shape or durability.
5. Material Selection:
- The choice of materials is critical when cutting out bear pieces. High-quality, soft and safe materials are essential to create a cuddly and huggable bear. Ensuring that the materials are free of allergens and meet safety standards is also crucial.
6. Colors and Fabrics:
- Bear patterns often specify colors and fabrics for different parts of the bear. Cutting the pieces from the recommended materials not only ensures visual appeal but also contributes to the bear’s tactile comfort.
7. Customization and Creativity:
- While following the bear pattern is essential for consistency, there’s room for creativity in choosing materials, colors and patterns. Personalizing your bear with unique touches allows you to create a one-of-a-kind companion.
8. Matching Features:
- When cutting pieces for the bear’s facial features, such as the eyes and nose, it’s important to match them precisely. Symmetry in the facial features contributes to the bear’s endearing appearance.
9. Quality Control:
- As you cut out the pieces, it’s an opportunity for quality control. Inspect each piece for any imperfections or irregularities that may affect the bear’s final look and feel.
10. Patience and Care: – Taking your time and exercising patience during the cutting process is essential. This stage sets the foundation for the bear’s construction and attention to detail at this point can significantly impact the final result.
In summary, following your bear pattern to cut out the various pieces is a critical step in creating a Plush Sleepy Bear that is not only visually appealing but also safe and huggable. Precision, attention to detail and a commitment to using high-quality materials are key elements in ensuring that your bear embodies the warmth and comfort that these beloved companions are known for. Whether you’re crafting a bear for yourself or as a gift, this stage is where the bear’s journey from pattern to plush truly begins.
For a comprehensive look at this subject, we invite you to read more on this dedicated page: Is it healthy to use my stuffed animal as a sex toy? – Quora
Sewing
Begin by sewing the bear’s ears, eyes and nose onto one of the body pieces. You can use embroidery thread to add extra detailing to the bear’s face.
Embarking on the journey of creating a plush bear is a delightful craft that allows you to infuse your unique creativity into every stitch. To expand upon the initial idea of sewing the bear’s features:
1. Crafting Expressive Features: When sewing the bear’s ears, eyes and nose onto one of the body pieces, consider the character and personality you want to give your bear. The shape and placement of these features can evoke various expressions, from playful to gentle or mischievous. Take your time to ensure that each stitch reflects the bear’s unique charm.
2. Embellishing with Embroidery: To elevate the bear’s facial details, embroidery thread becomes your artistic tool. Use different colors and techniques to add depth and texture to the bear’s eyes and nose. Delicate satin stitches or French knots can create a lifelike gleam in the eyes, while carefully placed stitches can emphasize the bear’s adorable button nose. These subtle touches transform your bear’s face into a work of art.
3. Attention to Proportions: Pay close attention to the proportions of the bear’s facial features. The size and placement of the eyes, for instance, can greatly influence the bear’s overall appearance. A well-balanced and symmetrical face adds to the bear’s visual appeal, making it more endearing.
4. Safety Considerations: If the plush bear is intended for a child, ensure that all features are securely attached and meet safety standards. Double-check that there are no loose threads or small parts that could pose a choking hazard. Safety eyes and noses, which are specifically designed for stuffed animals, are excellent options to consider.
5. Personalization: Beyond the basic features, consider personalizing your bear by adding unique touches. This could include embroidery of the bear’s name on its paw or a heartwarming message on a hidden tag inside the bear. These personal elements can make your creation even more special and meaningful.
6. Experiment with Fabrics: The choice of fabric for the bear’s features can also contribute to its character. Consider using contrasting materials for the ears, nose and eyes to create visual interest. For a tactile experience, opt for textured fabrics that add depth and sensory appeal to the bear’s face.
7. Storytelling Potential: As you meticulously sew the bear’s features, imagine the stories and adventures your bear will share with its future owner. The care and attention you invest in crafting its expressive face will make these storytelling moments even more magical and memorable.
In essence, sewing the bear’s ears, eyes and nose is not merely a technical step in the crafting process; it’s an opportunity to infuse personality, character and love into your handmade creation. Your choice of stitches, colors and placement transforms a collection of fabric pieces into a lovable and enduring companion, ready to embark on countless adventures and share in the joys of life.
For a comprehensive look at this subject, we invite you to read more on this dedicated page: Free Sloth cuddly toy sewing pattern – MY MONDAY MAKES
Body Assembly
Place the two body pieces together, right sides facing each other. Pin them together and start sewing along the edges, leaving a small opening for turning and stuffing.
Certainly, sewing plush toys can be a fun and rewarding craft. Continuing from your instruction, here’s a step-by-step guide for creating your own Plush Sleepy Bear:
Choosing Quality Fabric: Before you start sewing, make sure you’ve chosen a soft and durable fabric for your bear. Plush materials like fleece or minky are excellent choices, as they provide a huggable and cuddly texture.
Pattern and Cutting: Ensure you have a pattern for your bear’s body pieces. Pin the pattern to your fabric and carefully cut out the pieces, making sure to cut two identical shapes for the front and back of your bear.
Prepare Your Sewing Machine: Thread your sewing machine with a matching thread color and set it to a straight stitch. You can also sew by hand if you prefer a more traditional approach.
Aligning and Pinning: Place the two body pieces together, making sure the right sides of the fabric are facing each other. Pin the pieces together along the edges, leaving about a 1/4-inch seam allowance. Start at one point and work your way around, leaving a small opening (around 3-4 inches) on one side for turning and stuffing.
Sewing Seam: Begin sewing along the edges, starting a short distance before the opening and ending a short distance after it. Use a backstitch at the beginning and end to secure your seam. Be sure to sew carefully, following the pattern’s outline and maintaining an even seam allowance.
Turning and Stuffing: After sewing, carefully trim any excess fabric and clip any curved edges to help the bear’s shape look smoother when turned right-side out. Then, reach inside the small opening and gently turn the bear right-side out. This step requires patience and precision.
Stuffing the Bear: Now, it’s time to add the stuffing. Use a soft, hypoallergenic stuffing material to ensure your bear is fluffy and huggable. Start by filling the limbs and head, pushing the stuffing all the way to the ends to avoid lumps. Continue until your bear is plump and cuddly.
Closing the Opening: After stuffing, carefully hand-stitch the small opening closed. Make sure your stitches are secure to prevent any stuffing from escaping.
Adding Features: To give your Plush Sleepy Bear its unique personality, you can sew on features like buttons for eyes, a stitched nose and a mouth. Be sure to use safety eyes if the bear is intended for young children to prevent choking hazards.
Finishing Touches: Finally, you can personalize your bear by adding a ribbon bow, a heart-shaped patch or any other embellishments that make it special.
With these steps, you’ll have created a lovable Plush Sleepy Bear that’s ready to provide comfort and companionship for years to come. Crafting your own bear allows you to infuse it with your unique style and love, making it an even more cherished friend.
Explore this link for a more extensive examination of the topic: Amazon.com: Large Fat Cartoon Cute White Bear Dinosaur Plush …

Turning and Stuffing
Carefully turn your bear inside out through the opening you left. Now, it’s time to stuff your bear to your desired level of softness. Ensure that the stuffing is evenly distributed.
Carefully turn your bear inside out through the opening you left. This step is like revealing the hidden heart of your plush friend. It’s a moment filled with anticipation, as you prepare to bring your bear back to life with a touch of personalization and love.
Now, it’s time to stuff your bear to your desired level of softness. As you begin this process, consider the comfort level you want your bear to provide. Some may prefer a firm embrace, while others may desire a softer, more huggable feel.
Take your time with the stuffing, making sure that it’s evenly distributed throughout your bear. Pay attention to every nook and cranny, ensuring that your bear is plump and well-rounded. This step is where your bear truly takes on its unique character, reflecting your intentions and care.
Remember, as you fill your bear, you’re not just adding stuffing; you’re infusing it with your emotions and affection. Each handful of stuffing carries a piece of your love and creativity, making your bear a one-of-a-kind, cherished companion. So, take it slow and enjoy the process of bringing your plush Sleepy Bear to life, just the way you want it.
Explore this link for a more extensive examination of the topic: 40% of Adults Still Sleep with a Stuffed Animal. Here’s Why
Closing Seam
Hand-stitch the opening closed with a neat, hidden stitch. Your bear’s body is complete!
After hand-stitching the opening closed with a neat, hidden stitch, your bear’s body is complete! This final step not only secures the bear’s stuffing but also adds a professional touch to your creation. As you make those last careful stitches, you can’t help but feel a sense of accomplishment and pride in what you’ve crafted.
But remember, your DIY Plush Sleepy Bear is more than just a soft and cuddly toy; it’s a creation filled with love and creativity. It’s a testament to your crafting skills and a symbol of the care you’ve put into making it special. As you hold your completed bear, you’ll find yourself imagining the joy it will bring to the one who receives it, whether it’s your child, a friend or a loved one.
And don’t forget, the journey of crafting your own Plush Sleepy Bear is a delightful one. The process of selecting materials, cutting, sewing and personalizing is an enjoyable adventure that can be shared with others. Crafting these bears can become a cherished tradition, an opportunity to bond with family or friends and a way to create lasting memories together.
So, while your bear’s body is now complete, the joy it brings has only just begun. It’s a reminder of your creativity, your love and the special moments shared in the process of crafting. It’s a token of comfort and companionship that will be treasured for years to come, making it a truly exceptional and meaningful gift.
You can also read more about this here: DIY Lavender Scented Stuffed Animals – As The Bunny Hops®
Personalization and Details
One of the joys of crafting your own Plush Sleepy Bear is the ability to personalize it. You can:
One of the joys of crafting your own Plush Sleepy Bear is the ability to personalize it. You can infuse your unique character into every stitch and choice of materials. Here are some delightful ways to make your bear truly special:
Choose Your Fabric: Select the perfect fabric that resonates with your style and personality. Whether it’s a soft, cuddly fleece for a classic look or a vibrant pattern that reflects your individuality, the choice is yours.
Add Personalized Embroidery: Stitch a name, special date or a heartfelt message onto your bear’s paw or heart. This personal touch makes it a cherished keepsake or a memorable gift for a loved one.
Select Colors and Accessories: Customize your bear’s features by choosing colors for its eyes, nose and mouth. You can also add accessories like a cute bowtie, a tiny hat or even a miniature outfit to give your bear a distinct character.
Adjust Size and Shape: Depending on your preferences, you can alter the bear’s size and shape. Whether you want a chubby bear for extra huggability or a slender one for easy carrying, tailor it to your liking.
Incorporate Fragrances: Infuse your bear with a calming scent, such as lavender or vanilla, to provide comfort and relaxation. This is especially lovely for children who use their bears as sleep companions.
Include a Voice Recording: Record a heartfelt message or a soothing lullaby to be played when hugging your bear. This adds an extra layer of emotional connection.
Sew in Memories: If you’re making the bear as a gift, consider sewing in small items that hold sentimental value, like a piece of fabric from an old baby blanket or a snippet of a favorite childhood t-shirt.
Create a Birth Certificate: Craft a personalized birth certificate for your bear, complete with a name, birthdate and a description of its unique characteristics. It’s a fun way to make your bear feel like a real member of the family.
Crafting your own Plush Sleepy Bear is not just a creative endeavor; it’s a journey of self-expression and love. With these personalized touches, your bear becomes a cherished companion with a story as unique as your own.
Should you desire more in-depth information, it’s available for your perusal on this page: Custom Teddy Bear with Voice Recording | Bear with Recorded …

Add Clothing
Create tiny outfits or accessories for your bear to give it a unique style.
Enhancing your plush sleepy bear’s charm is an exciting creative endeavor that allows you to infuse personality and uniqueness into your cuddly companion. One delightful way to achieve this is by crafting tiny outfits or accessories tailored to your bear’s character. By dressing up your bear, you not only add a touch of flair but also make a stronger connection with your furry friend. Here are a few more ideas to expand upon this concept:
Personalized Wardrobe: Think of your bear’s wardrobe as a blank canvas waiting for your artistic touch. Craft miniature clothing items such as dresses, shirts or even tiny sweaters using colorful fabrics and patterns that resonate with your bear’s identity. This will not only showcase your creative flair but also allow your bear to express its unique style.
Accessorize with Flair: Accessories can speak volumes about your bear’s personality. Create an array of tiny accessories like hats, scarves, sunglasses or even a miniature backpack. Each accessory can tell a different story, making your bear’s appearance ever more intriguing.
Seasonal Themes: Celebrate different seasons and holidays by crafting themed outfits and accessories for your bear. Dress it up as a cozy winter bear with a knitted scarf and mittens or give it a springtime makeover with a floral crown. This way, your bear can reflect the changing seasons just like you do.
Matching Sets: Extend the fun by making matching outfits or accessories for yourself and your bear. This can be a fantastic bonding activity and an adorable way to showcase your friendship. Imagine going to a picnic with your bear, both dressed in matching outfits!
Storytelling Through Style: Use your bear’s outfits and accessories to weave stories and adventures. Whether it’s a bear that’s ready for a day at the beach or one dressed as a fearless explorer, the attire can provide a starting point for imaginative play and storytelling.
Share Your Creations: If you’re particularly proud of your bear’s stylish ensembles, consider sharing your creations with friends and family. You could even host a bear fashion show or a crafting session where everyone can design outfits for their bears.
In summary, the possibilities are endless when it comes to enhancing your plush sleepy bear’s style. By creating tiny outfits and accessories, you not only tap into your creativity but also strengthen the special bond between you and your cuddly companion. It’s a delightful journey of self-expression and imagination that can bring endless joy to both you and your bear.
Explore this link for a more extensive examination of the topic: Simulation Lovely Dog That Make Sounds Doll Cute Sleeping Plush …
Name Your Bear
Give your bear a special name or embroider your child’s name on it for that extra personal touch.
Personalization: Elevating the Connection with Your Bear
Taking the time to personalize your bear is a heartwarming gesture that deepens the bond between your child and their furry friend. Here’s how adding a special name or embroidering your child’s name on the bear elevates this connection and makes the bear truly unique:
Identity and Ownership: Giving the bear a name or embroidering your child’s name on it provides a sense of identity and ownership. It’s as if the bear becomes an individual with its own personality and history, making it more than just a toy.
Attachment and Comfort: Personalization enhances the emotional connection between your child and the bear. When they see their name or the bear’s name, it reinforces the special bond they share, offering comfort during times of stress or uncertainty.
Sense of Responsibility: Children often feel a sense of responsibility towards their personalized bear. They become caretakers, ensuring that their bear is safe and well-loved. This fosters a sense of responsibility and empathy.
Memorable Moments: Personalization creates memorable moments. Whether it’s the excitement of choosing a name or watching their own name being embroidered, these experiences become cherished memories for both parent and child.
Uniqueness and Individuality: A personalized bear is one of a kind. It stands out from other toys, making it a unique and cherished companion. This sense of individuality reinforces the bear’s special place in your child’s heart.
Ownership Transition: Personalized bears often become keepsakes. As your child grows, the bear can transition from a beloved toy to a cherished memento of childhood. Personalization preserves the bear’s significance over time.
Learning Opportunity: Involving your child in the process of choosing a name or seeing their name being embroidered is a learning opportunity. It encourages decision-making, creativity and an understanding of the concept of ownership.
Enhanced Emotional Expression: Personalization can serve as a tool for emotional expression. Your child may share stories or conversations with their bear that revolve around the chosen name, providing an outlet for feelings and imagination.
Family Tradition: Personalizing the bear can become a cherished family tradition. If older siblings have their bears personalized, it creates a connection between generations and a sense of family history.
Companionship for Years: A personalized bear is more likely to remain a treasured companion throughout childhood and beyond. Its unique name or the embroidered name serves as a constant reminder of the special bond your child shares with their bear.
In summary, adding a special name or embroidering your child’s name on their plush bear is a beautiful way to enhance the connection and create lasting memories. It fosters a sense of identity, responsibility and attachment, making the bear not just a toy but a beloved friend. This small but meaningful gesture can have a significant impact on your child’s emotional development and their relationship with their furry companion.
You can also read more about this here: The Case for Sleeping With Stuffed Animals as an Adult | Wirecutter
Decorate
Use fabric markers or embroidery to add details like smiles, rosy cheeks or patterns on your bear’s clothing.
To enhance the charm and character of your plush sleepy bear, consider utilizing fabric markers or embroidery to introduce delightful details. Simple additions like warm smiles, rosy cheeks or intricate patterns on the bear’s clothing can breathe life into your creation, making it unique and endearing. These personalized touches not only showcase your creativity but also convey a sense of joy and affection, making your bear a special companion for anyone lucky enough to cuddle with it. Experiment with different designs and colors to capture the essence of the bear and infuse it with a personality that reflects your creativity and love.
If you’d like to dive deeper into this subject, there’s more to discover on this page: 40% of Adults Still Sleep with a Stuffed Animal. Here’s Why

Enjoying Your Creation
Once your DIY Plush Sleepy Bear is complete, it’s ready to become a cherished companion. Your bear can accompany your child during bedtime, join them for tea parties or simply provide comfort during moments of play and rest. The love and care you poured into crafting this cuddly companion make it a truly special addition to your family.
Once your DIY Plush Sleepy Bear is complete, it not only becomes a cherished companion but a symbol of the love and creativity that you’ve infused into your family’s life. This one-of-a-kind bear is more than just a toy; it’s a conduit of imagination, a vessel of comfort and a tangible representation of your dedication. Here’s a deeper dive into how your homemade bear becomes an integral part of your family’s story:
1. Bedtime Bliss:
Your DIY bear can be a loyal bedtime buddy, accompanying your child on adventures in dreamland. Its soft embrace provides a sense of security and comfort, making bedtime routines a delightful and soothing experience.
2. Tea Party Guest of Honor:
During tea parties and imaginative gatherings, your bear assumes the role of an honored guest. It participates in the most whimsical of conversations, sips pretend tea and adds an element of enchantment to your child’s playtime.
3. Creative Playmate:
Your handmade bear becomes the ideal playmate, igniting your child’s imagination. Whether it’s exploring far-off lands, embarking on daring quests or simply sharing secrets, the bear is a versatile companion in the world of make-believe.
4. Comfort in Times of Need:
Life’s journey is filled with ups and downs and your DIY bear is there to offer solace during challenging moments. Its comforting presence provides reassurance and emotional support, helping your child navigate difficult times with resilience.
5. Personalized Connection:
The bear’s uniqueness, a product of your creativity, fosters a personalized connection. Your child knows that this bear is one-of-a-kind, just like their bond with it. This sense of individuality strengthens the emotional attachment.
6. Family Heirloom:
As time passes, your DIY Plush Sleepy Bear can evolve into a cherished family heirloom. It may be passed down through generations, each new owner adding their own stories and memories to the bear’s legacy.
7. DIY Pride:
Your child takes pride in knowing they played a significant role in creating their special companion. This sense of accomplishment boosts their self-esteem and fosters a deeper appreciation for the value of handmade and meaningful gifts.
8. Building Memories:
The adventures and moments shared with your DIY bear become treasured memories. Whether it’s the bear’s first tea party or its role in comforting a scraped knee, these memories are woven into the fabric of your family’s story.
9. Nurturing Creativity:
Having a DIY bear encourages creativity and hands-on crafting skills. It sets the stage for future DIY projects, fostering a love for creativity and self-expression.
In summary, your DIY Plush Sleepy Bear transcends the realm of a simple stuffed toy; it becomes a member of your family, an emblem of creativity and a source of comfort. Its presence adds a layer of enchantment to your child’s world, offering companionship, solace and a tangible representation of your love and care. This DIY bear is more than a craft project; it’s a heartfelt creation that contributes to the tapestry of your family’s cherished memories and traditions.
For additional details, consider exploring the related content available here 7 Reasons Adults Should Have Stuffed Animals Too | Mental Health

Sharing the Craft
Creating DIY Plush Sleepy Bears can also be a wonderful bonding experience. You can involve your children in the process, teaching them basic sewing skills and fostering their creativity. Crafting together can create lasting memories and strengthen family connections.
Creating DIY Plush Sleepy Bears can also be a wonderful bonding experience that goes beyond just crafting cute stuffed animals. When you involve your children in the process, you’re not only teaching them basic sewing skills but also fostering their creativity and imagination.
As you sit down together with needles, threads and soft materials, you’re creating more than just plush bears; you’re crafting lasting memories. The shared moments of laughter, the triumph of finishing a project and the joy of seeing a unique creation come to life are all invaluable experiences that can strengthen your family connections.
Through this creative endeavor, you’re not just making bears; you’re building bridges between generations. The patience and guidance you offer while sewing can instill a sense of accomplishment and boost your child’s self-esteem. It’s a chance to share stories, talk about family traditions and pass on the values that matter most to you.
In a world filled with screens and distractions, crafting together provides a meaningful escape into a world of imagination and tactile exploration. It’s a time when both you and your children can put away your devices and be fully present with each other.
Moreover, DIY plush bear crafting can be a stepping stone for discovering your family’s unique traditions. Maybe your children will develop a love for crafting and pass it on to their children, creating a beautiful legacy of creativity and togetherness.
So, the next time you consider embarking on a DIY plush bear-making adventure, remember that you’re not just creating cuddly toys; you’re weaving the fabric of stronger family bonds and cherished memories that will last a lifetime.
You can also read more about this here: Simulation Lovely Dog That Make Sounds Doll Cute Sleeping Plush …
In conclusion, crafting your own Plush Sleepy Bear is a rewarding and heartwarming endeavor. It allows you to personalize a cuddly companion and infuse it with love and care. Whether you’re an experienced crafter or a beginner, the joy of creating a bear that’s uniquely yours is an experience that both children and adults can treasure for years to come.
To sum it up, the act of crafting your own Plush Sleepy Bear is not merely a creative project; it’s a profoundly rewarding and heartwarming journey. It grants you the privilege of tailoring a cuddly companion to your exact specifications, infusing it with an abundance of love and care along the way. Whether you’re an experienced crafter with a wealth of sewing expertise or a beginner embarking on your first DIY project, the joy of creating a bear that is uniquely yours is an experience that transcends age and skill level.
1. A Source of Pride: Completing your DIY Plush Sleepy Bear instills a sense of accomplishment and pride. Witnessing the transformation of basic materials into a huggable friend is a gratifying achievement that both children and adults can take immense pride in.
2. Treasured Memories: The memories forged during the process of crafting a Plush Sleepy Bear are equally as valuable as the bear itself. Whether it’s the laughter shared while stitching or the anticipation of seeing your creation come to life, these memories become a cherished part of your personal narrative.
3. Lifelong Companionship: The Plush Sleepy Bear you craft becomes more than a toy; it becomes a lifelong companion. It’s there to share in your joys and offer solace during times of need. Its presence provides a sense of continuity and comfort, transcending the passage of time.
4. A Gift of Love: If you choose to gift your handmade bear to a loved one, it becomes a tangible expression of your affection. The recipient not only receives a cuddly friend but also a heartfelt token of your care and devotion.
5. A Creative Outlet: For those who relish creative endeavors, crafting a Plush Sleepy Bear is an ideal outlet for artistic expression. It allows you to experiment with fabrics, colors and design, nurturing your creative spirit in the process.
6. Bonding Experience: When crafting alongside family members or friends, the experience becomes a delightful bonding opportunity. It encourages teamwork, shared laughter and a sense of togetherness that strengthens relationships.
In essence, crafting your own Plush Sleepy Bear is a journey that encompasses joy, fulfillment and a profound sense of connection. Whether you’re cuddling with your creation as you drift off to sleep or gifting it to someone dear, the bear carries with it the essence of your love and the warmth of your craftsmanship. It is a tangible reminder that the act of creation is a gift in itself, offering both children and adults a treasure trove of heartwarming experiences and a companion to cherish for years to come.
To expand your knowledge on this subject, make sure to read on at this location: The Benefits of Stuffed Animals in Child Development
More links
To expand your knowledge on this subject, make sure to read on at this location: 40% of Adults Still Sleep with a Stuffed Animal. Here’s Why